"God will prepare everything for our perfect happiness in heaven, and if it takes my dog being there, I believe he'll be there." Billy Graham
Tuesday, November 24, 2009
A Christmas Card Outside of the Envelope...
Sometimes you have to push the envelope literally! In playing with different shapes and sizes of cards I came up with this design. The card is meant to fit in a 4 1/8 by 9 1/2 legal envelope. Most folks refer to them as legal size envelopes... I thought this would be a nice change from some of the other cards I have tried. And the image from Eat Cake Graphics seems to fit proportionally to a larger envelope. If I could just get my proportions back in line too... LOL... The holidays have a way of doing that to us... Hope you all have a wonderful and safe Thanksgiving holiday!
Materials List
Cardstock - Bazzil - Light Blue
Gina K Designs Pure Luxury - White
Pattern Paper - Flair Designs - The Nativity
Memento Ink - Tuxedo Black
Markers - Copic
Stickles - Yellow - (Stars in image)
Ribbon - Gina K Designs
Image - Eat Cake Graphics
Corner Rounder - Creative Memories
Pop Dots
Sunday, November 22, 2009
Grateful
There are many things I am grateful for this holiday season. And one mentor in particular comes to mind. A dear church friend has been battling cancer this year. For almost 8 months she has taken chemo treatments every other week. Each time I see her she seems more and more frail but her spirit... She is still the same vibrant and vivacious woman she always was! She is so much stronger than I could ever be! Since early this spring I have made it a mission to send her a handmade card each week. This week I received the most wonderful gift. She sent me a handwritten card expressing how much she loves each and every one. She has lined them up on her mantle and kitchen table. Her note says each time she feels down or sick she picks one out to look at and remembers me! I have to admit I cried like a baby. It amazes me that even in such a dark time she thinks of and prays for me! And so I am deeply thankful for Sharon and her love! I created this card to express my gratitude for her example and love! Hope you enjoy!
Materials List
Cardstock - Burgundy - Bazzill
White - Gina K Pure Luxury Cardstock - White
Sage Green - DCWV - Mat Stack - White Core
Pattern Paper - Reminisce - Autumn Breeze
Provocraft Gypsy - Carts - George and Gypsy Wanderings
Ink - Memento Ink - Tuxedo Black
Stamp - Close to My Heart - Give Thanks
Markers - Copic
Ribbon - Offray - 7/8 inch Sherry
Corner Rounder - Creative Memories
Pop Dots
Sanding Block
Saturday, November 21, 2009
Reason for the Season
With all the hustle and bustle of the holiday season I am guilty of forgetting the true meaning of the holiday. I discovered this set of stamps by Our Daily Bread Designs and had to start my Christmas cards! As a Christian, the holiday should mean so much more than decorating, presents and traditions. What a wonderful gift we received. Ultimately he was the best gift of all! Have a blessed day!
Materials List
Cardstock - Bazzill
Pattern Paper - Adornit Carolee's Creations - Happy Holidays
Stamp and Sentiment - Our Daily Bread Designs - Blessed Christmas
Robin's Nest Dew Drops - Pearl
Ribbon - Offray - Red - 5/8 inch satin
Ink - Memento - Tuxedo Black
Markers - Copic
Ionic Punch - Ticket corners
Pop Dots
Sunday, November 15, 2009
Pedestal Card - Part 2
Today's post includes my first pedestal card as well as my second one. Instructions for the first one (the poinsettia) were included on my last post. I was attempting to "perfect" my attempt at pedestal cards with the second. I hope you enjoy and have a wonderful day!
Materials List
Cardstock - Bazzill - Bling - Aquamarine
White
Pattern Paper - Bo Bunny - Jack Frost
Cuttlebug Folders - Swiss Dots (embossed on base of snowglobe and run back through Cuttlebug to "flatten" the design)
Snow Dots - Globe
D'vine Swirls - Horse Mane and Tail
Cricut cuts - Globe - Joys of the Season - Horse - Winter Woodland
Ranger Stickles - Diamond - Horse Hooves, Mane and Tail
Ribbon - White - Stampin Up
Punch - Martha Stewart
Sentiment - Inkadinkado
Ink - Memento - Summer Sky
Versamark - Dazzle - Stamp sentiment first and apply Summer sky ink for shimmer
Thursday, November 5, 2009
Tis the Season - Part 1 - Pedestal Card
Today I am showing my very first pedestal card! I enjoyed experimenting with this new type of card. The base of the card is created with a 12 inch by 6 inch piece of paper. I scored it at the 6 inch point (middle of the card) and again at 3 inches. This final fold will allow you to prop up the front of the card to display it. When assembling the card it is important to pick an image that can be attached to the BOTTOM 3 inches of that fold. Otherwise, it will not "pop" up when you display it. I hope you enjoy the next few days as I show another pedestal card example and a favorite new nativity stamp! Have a great day!
Materials List
Pattern Paper - Kaisercraft - Deck the Halls - Holly
Cardstock - Bazzill - White, Red, Green & Goldenrod
Poinsettia - Cricut Joys of the Season
Sentiment - Stampendous Christmas Wish
Ink - Memento Rhubarb Stalk
Stickles - Ranger Ink - Yellow
Cuttlebug Folders - Swiss Dots, D'Vine Swirls
Corner Rounder - Creative Memories
Pop Dots
Wednesday, November 4, 2009
Friends and Coffee
There is nothing better than a good cup of coffee or a really good friend. When we spend time with friends and family it is often over a good meal or a nice cup of java. This stamp from Gina K Designs celebrates the bond we have with both. This is one of my favorite creations and I hope my coffee loving friend will enjoy receiving it! Have a blessed day!
Materials List
Cardstock - Bazzill - Brown & Eggshell
Cardstock - Image - Gina K Pure Luxury - White
Pattern Paper - Bo Bunny Back to Backs Kitchen Spice Cloves - reverse side
Stamps - Image - Gina K Signs of Autumn Collection
Stamps - Sentiment - Gina K - Thanks a Million! Collection
Ink - Memento - Tuxedo Black
Markers - Copic
Nestabilities - Petite Scalloped Ovals and Ovals - Large
Corner Rounder - Creative Memories
Pop Dots
Ribbon - Unknown
Tuesday, November 3, 2009
Isaiah 40:31
I love using scriptures on my cards. But until now I generated it using Word on my computer. Our Daily Bread Designs has some wonderful stamps that relate to scripture. One of my favorites is Isaiah 40:31. I love the imagery of the eagle and particularly it's meaning to the United States. Hope you soar today too!
Materials List
Cardstock - Bazzill - White and Light Brown
Image and Sentiment - Our Daily Bread Designs
Ink - Memento - Tuxedo Ink
Markers - Copic
Ribbon - Offray 7/8 Grosgrain Brown
Pop Dots
Monday, November 2, 2009
Stamping for Thanksgiving
Welcome! In my last post I pondered the difficulty of creating a Thanksgiving card. So here is my attempt! I hope you enjoy it! Thanks as always and feedback is greatly appreciated! Have a great Monday!
Materials List
Cardstock - Bazzill - light brown
Pattern Paper - Karen Foster - Pumpkin Vines
Paper for Image - Gina K Luxury Cardstock - White
Sentiment and Image - Close to My Heart - Give Thanks
Markers - Copic
Glitter (on swirls of letters) Marvy Uchida - Just Glitter Pen - Gold
Inking - ColorBox Cats Eye Chalk - Chestnut Roan
Ink - Memento Tuxedo Black
Ribbon - Stampin Up
Embellishments - Robin's Nest Dew Drops - Harvest
Pop Dots
Sunday, November 1, 2009
My new love... stamping!
First of all, I am so sorry! I can't believe it has been two whole weeks since I posted something. Things have been incredibly chaotic at my household. We have frantically been trying to do some major property improvements over the last few weeks before Old Man Winter comes a-calling! With that said, wow, does anyone else feel like life can come at you quickly? I can't believe as I am writing this we have moved into the month of November. Halloween is now a recent memory and Thanksgiving is on the horizon! Creatively, I have such a hard time during this in-between stage. Everyone loves to make fall/Halloween cards but what in the world do you do for Thanksgiving? While I am trying to figure that out, I will continue to post other fun cards! My new card passion is stamping! I hope you enjoy looking at it as much as I had making it! Have a wonderful and blessed week!
Materials List
Sentiment Stamp - Hero Arts
Image Stamp - C.C. Designs Rubber Stamps
Copic Markers
Memento Ink - Tuxedo Black
Paper - Bo Bunny - Boo Crew Here's Looking at You
Cardstock - Black
Ribbon - Unknown
Sunday, October 18, 2009
Get Well Card
Materials List for Today's Card
Nestabilities Classic Ovals Large and Petite Scalloped Ovals Large
Stamps - Papertrey Inks - First Fruits Collection
Ink - Memento Dew Drops Desert Sand
Cuttlebug Folder - Moroccan Screen?
Ranger Ink - Embossing Powder Copper
Ribbon - Stampin' Up
Cardstock - Chocolate, Cocoa, Beige
Hope you have a great week!
Saturday, October 17, 2009
SaintsRule! Scrappin Corner
This week I have been stuck at home sick. Yuck! My doctor ordered me to stay in until the first of the week. Anyone who knows me, realizes just how nuts this makes me. I have been too sick to scrap. I think I have turned a corner, thankfully! In the meantime, I thought I would share some photos of my scrappin area! It is definitely a work in process. But I love it! Hope you have a great day!
First, an overall view of my table and pegboard. I am blessed to have a large guest room on the second floor of my house. This half of the room is dedicated to my crafting! I repurposed our old kitchen table. My hubby recently purchased the office chair to help with my back pain while I am crafting!
Second, a view of the storage area to the left of my table. Here I have some JetMax cubes from Michael's and Target. I love this area and hope to add more cubes in the future. I also have a black paper rack with patterned paper divided into themes. For example, I categorize things like birthday, Christmas, Fall and file them accordingly. This rack has a cover I can put over it when not in use to keep my paper clean!
My favorite photo of Morgan sits on my desk for inspiration! You may have seen her baby photo on the Cricut messageboard. She is my avatar!
On the right side of my table I have stored my collection of stamps in Jewel cases. I have them categorized for easy access!
Directly to the right of my table is my Cricut station. I have repurposed a corkboard and categorized my ribbon in ROY G. BIV order! Wood mounted stamps are stored in the desk drawers.
I have all of my punches stored in a shoe caddy hanging behind the door. It is in easy proximity to my Cricut in case of a punching emergency!
And finally my next project is to organize my pitiful stash of scraps! Ideas are welcome! Thanks for looking!
Thursday, October 15, 2009
Scrapping Cottage
Scrapping Cottage is on a mission! If you choose to accept it you will be asked to be one of 500 followers... The winner may choose a gift certificate for a $250 shopping spree... This tape will self destruct in 1...2....
http://scrappingcottage.blogspot.com/search?updated-max=2009-10-02T08%3A30%3A00-07%3A00
Wednesday, October 14, 2009
Birthday Blessings - Farm Theme
Fall on the farm means harvest time. In this part of Kentucky that means the hay is baled and the tobacco is hanging in the barn. The evenings are getting longer and the temperature is getting lower. There is a slight breather for those of us who make our living off of the land... very brief. Soon it will be time to take down and strip tobacco. Farming is a 24-7, 356 day a year job. But there is none like it! I am sending this birthday card to my daughter-in-law who recently moved with my step-son to Missouri. I hope it reminds her of home and how much she is loved and missed! Hope you have a great day!
Materials list
Cardstock - black, red, green (John Deere of course), brown, yellow and white
Card - 5 X 7 black cardstock for body of card
Die cuts - Moon - George
Barn - Every Day Paper Dolls
Tree - Paper Doll Dress Up
Tractor - Every Day Paper Dolls
Sentiment - George
Chalks - White and Black - night sky - white, moon - black
Pen - Brown Creative Memories - details on tree
Floss - Making Memories Goldenrod - Hay in barn
Cuttlebug - Divine Swirls folder - tractor tires
Friday, October 9, 2009
Hello Ducky Card
We have been deluged with rain where I live. Not just several days of a steady rain but a couple of days with torrential downpours. So much so, the ground feels like a very large sponge. We all know that this kind of weather is perfectly ducky for our feathered friends. Keeping this in mind I created a fun card to send to cheer up one of my ill buddies! Thanks for stopping in!
Materials List
Cardstock - Aqua, Yellow, Orange
Pattern Paper - Piggy Tales it's raining, it's pouring collection (no kidding!)
Memento Dew Drop Ink - Bahama Blue - shadow Hello
Fiskars - Zingz - rain drops and splats ($1 find at BigLots)
Die cuts - Hello - Cricut Gypsy Font
Duck - Cricut Animal Kingdom
Umbrella - Cricut Sweethearts
Welding of Diecuts - Provocraft Gypsy
Uniball Pen - White - eyes and lacing of umbrella
Zig Ball Pen - Black - eyes
Pop dots for dimention
Ribbon - unknown
Friday, October 2, 2009
Signs of Autumn
Recently I posted a card using the Gina K Designs Signs of Autumn stamp collection. I love stamps but I am terribly guilty of purchasing a stamp and only utilizing it once. I love the pumpkin stamp in this set so much I decided to challenge myself to use the same stamp several different ways. The first post I used the cracked glass technique that Gina K posted on StampTV. This time I put my own spin on a card using the same stamp. I also forced myself to use some very old supplies. I literally had to knock the dust off of my Creative Memories Punch... LOL... Challenge yourself to re-purpose things you have in your scrappin stash for new projects. I think it is the best way to re-awaken your creativity! Enjoy!
Materials List
Cardstock - Bazzill Orange - 4 1/2 inches by 4 inches, Chocolate - background for image
Cuttlebug Folder - Pumpkin Harvest (I embossed it backwards, quite by accident but I like the look)
Gina K Signs of Autumn Stamp Colllection - Pumpkins
Sentiment - Hello - unknown
Copic Markers - Pumpkins
Memento Ink - Tuxedo Black - Image and sentiment
Creative Memories - 1 inch punch - punched image into 4 blocks
Pop Dots - adhere 4 squares to chocolate background
Ribbon - Offray 7/8 inch Grosgrain Brown
Wednesday, September 30, 2009
Fall Treat Bags
Normally I whip out the Cricut to make treat bags. This time I decided to try something a little simpler! This pattern would be ideal for birthday party, wedding and shower favors! Let your imagination run wild!
Pattern
11 inch by 3 3/4 inch cardstock
Score at 2 3/4 (top flap)
6 1/4 and 7 1/2 (bottom of treat bag)
Cardstock - Bazzill - Dark Brown - treat bag, orange and green - pumpkin, Light brown - medallion
Nestabilities - Large Petite Scallop Circles
Cuttlebug folders - argyle - front flap, swiss dot - pumpkins
Martha Stewart Snowflake punch - sprigs of greenery
Cricut George Cartridge - green heart - tucked behind pumpkin for stem
Stamp - Boo - Studio G
Pop Dots
Jute Twine
Big Bite - holes at top middle of flap, bottom middle of medallion
Run Jute behind front flap and attached medallion, wrapping jute under botton and tying at top
Gift Card Holder
I have a hard time buying appropriate gifts! Does anyone else suffer from this syndrome? I never know what people REALLY want. A few years ago, I decided to give gift cards. I thought this was being impersonal... but if the recepient never uses your gift... LOL... This little one will go to a special young lady who grooms my Saints! Enjoy!
Materials List
Cardstock - Black, White Bazzill
Bling - Aquamarine Bazzill
Stamps - image - Eat Cake Graphics
sentiment - unknown
Nestibilties - Large Circles and Large Circle Petite Scallops
Markers - Copic
Ink - Memento Black Tuxedo - image and sentiment
Memento Blue Sky - Sponged daubed background
Ranger Stickles - Copper - dog tag
Martha Stewart Punch - Edging of card
Tuesday, September 29, 2009
Stamping TV - Cracked Glass Technique
I watched Gina K demonstrate this technique a few weeks back. I decided to duplicate the technique for a card going to a friend dealing with chemo. I loved her design so much I used the same stamp she featured. The stamp is from Gina K's autumn collection. The card I created is a little different! By no means is it as lovely as hers but I hope you enjoy it nonetheless. Hope you are having a great week!
Materials List
Stamps - Pumpkins - Gina K
Sentiment - unknown
Copic Markers - Pumpkins
Ultra Thick Embossing Enamel - applied in three coats
Versamark - Embossing Pad
Memento Ink - Rich Cocoa - sponged on image after it is "cracked"
Cardstock - Bazzill - burgundy
Pattern Paper - Chatterbox
Ribbon - Orange - Offray
Brown - Offray - two strands of ribbon layered together
Cracked glass technique -
1. cover image with Versamark and pour embossing powder on
2. heat and repeat steps until desired thickness
3. place image in freezer for a few minutes
4. remove and bend to "crack" in desired design
5. apply inking of choice (Memento Rich Cocoa) with sponge dauber to age
6. utilize image in desired card!
Thursday, September 24, 2009
Seasons Greetings!
I can't believe I am thinking about Christmas! But in a few short months it will be here, ready or not! Each Christmas in our household is special. We have certain family traditions we maintain. I love live trees. We get an eight foot tree and start decorating. Each ornament tells a story. I have collected glass ornaments for years. But when I married my husband something changed about "my tree." You see I became a step-mom. Even though both boys were grown I felt like the tree in our house should be a reflection of everyone. So coupled with my Radko ornaments are beautiful wooden ornaments painted by their deceased mother. I also put ornaments each boy made when they were little. It is an eclectic group but it says so much about us and our family. On my tree there is a beautiful cardinal ornament. It is special because a very dear friend gave it to me. It reminds me of the blessings my creator as bestowed on me. It also reminds me of the beauty around me. It doesn't have to be shiny glass ornaments.... it can be as simple as a wooden ornament painted long ago with great love. This is hoping your holiday season will be blessed as well!
Materials List
Cardstock - White, Red, Black, Green
Image - Close to My Heart - Season of Splendor
Versamark - stamp first and then ink to make image solid
Memento Inks - Rich Cocoa - top layer of pinecone
Desert Sand - under layer of pinecone
Tuxedo Black - edging of cardinal
Lady Bug - under layer of cardinal
Cottage Ivy - evergreen
Summer Sky - sponged over scalloped image to make clouds
Stickles - Diamond - edging on pinecome (looks like snow)
Nestabilities - Petite Scalloped Ovals - large
Cricut - Winter Woodland - Holly
Pop Dots - lift up holly and cardinal image
Cuttlebug - Victoria folder - Holly
Ribbon - unknown - Walmart
Sunday, September 20, 2009
Simplify
Wow! How many of us really can say this phrase and mean it? In a world of high speed internet, cell phones, digital television, high definition radio it seems almost laughable. When was the last time you read an honest to goodness book or sent out a letter instead of an email? Children today don't know how to live without television and my goodness, there was actually a time without video games? Now that is truly primitive living, LOL.... I think we miss out on some of the greatest blessings in life because we live too fast paced a lifestyle. So I intend to slow down this week... (hopefully my boss will understand) and live a little! So this posting you will see some familiar paper... I am using scraps from my last project! This is my first example of slowing down and using what I have! Hope you have a simple day too!
Materials List
Cardstock - black and ivory
Pattern Paper - K & Co Black Gingham
Nestabilities - Standard Circles Large and Petite Scalloped Circles Large
Martha Stewart Create Glitter Glue
Stampendous - Flock - White (sheep)
Stamps and Sentiment - Cornish Heritage Farms - Rubbage Bin - Primitive Blessing Set
Ionic Ticket Punch
Ribbon - Stampin up - black
Memento Ink - Tuxedo Black
Memento Ink - Rich Cocoa and Desert Sand - inking on edge of image
Tuesday, September 15, 2009
From My Kitchen
I love anything old... good thing... because I am old! LOL... I remember as a child my mother had a white painted hoosier cabinet. It had belonged to my grandmother. It had a graniteware pull out board for making bread. We made many homemade biscuits there. My mother on the other hand says she hates anything old. She jokingly says she grew up with old stuff and doesn't want it in her house now! Sometime in the 80's that precious cabinet went to the landfill. I was only a teen and did not understand the "heritage" I was losing. There is a danger in placing value in wordly possessions. However, the connection to our heritage is truly priceless. I can no longer run my hands over the cool granite where my grandmother made countless loaves of bread. When I saw this cartridge I knew I wanted to honor a simpler time, when we knew who our neighbors were. Folks sat on their front porch and watched the world go by or shot the breeze with a friend... Makes me want to slow down and say hello to those I love and value! Enjoy!
Materials List
Cardstock - Bazzill - Black, Red, Cobalt Blue, Green, Tan, Brown
Paper - K & Co. Life's Journey Black Gingham
Ionic Ticket Punch
Sentiment - Unknown
Memento Ink - Tuxedo Black - (sentiment)
Paint - Making Memories Scrapbook Colors - Spotlight (speckled with toothbrush on
coffee pot)
Pop Dots - raise coffee pot, apple and rolling pin
Cricut cuts - A Child's Year and From My Kitchen
Monday, September 14, 2009
Teacher Appreciation Card
It is true confession time! I really, really, really wanted to become a teacher when I was a youngster. When I entered college I decided to pursue a "practical" vocation. The desire never left and 16 years after graduating the first time I went back. I became an honest to goodness teacher! What a time to graduate with the economy tanking... LOL... So even though I can't find a job, I will continue to look. It was both exhilarating and exhausting. I created this card as a special thank you for my mentor. I want her to know that each time I enter a classroom I will think of her and what she taught me. Enjoy!
Materials List
Cardstock - black, green, brown, white
Pattern Paper - unknown
Sentiment - unknown
Embossing Ink Pad - Versamark Dazzle - Frost
Embossing Powder - Stampendous White Opaque
Owl Stamp - Hero Arts
Heat Gun
Cricut Cartridges - Makin' the Grade, George (seeds-very small ovals)
Sunday, September 13, 2009
Fore You... Golf Theme Card
Thankfully my husband does not play golf! I have heard horror stories about "golf widows." Fortunately for me, John is not gone every weekend chasing a small white ball around a mowed pasture. (Really sounds funny when you think about it...) Hobbies are good right? After all I am addicted to scrapping! So have a little fun and chase that ball around the field. Life is too short not to have a little "fun." LOL Hope you enjoy the card!
Materials List
Cricut Cartridge - Everyday Paperdolls - golfer, grass, golf cart, bag for clubs
Cardstock - black, white, green, flesh, gray
Pattern Paper - Bo Bunny Shabby Princess Sunflower Plaid
Rub-ons - American Crafts MiniMARKS Ned Jr.
Cuttlebug Folder - Swiss Dots - Background reversed to look like a dimpled golfball
Peachy Keen Stamps - face on golfer
Memento Ink - Tuxedo Black - face
Chalk - pink - glow on golfer's cheeks
Marker - Izod and Nike Swoosh on golfer
Pop Dots
Saturday, September 12, 2009
Waxed Paper Technique Card
We St. Bernard lovers are a die-hard breed! (Pun intended) One of my Bernard loving buddies loves to exchange photos and letters about how her dear "Mabel" is doing. So I decided to send her a little note to let her know that I am thinking about her... and maybe include a photo bragging about my babies... :-)
Materials List
For background paper -
Waxed Paper
Glossy Cardstock
Iron
Memento Ink - Rich Cocoa
Towel
Remainder of card -
White, Black and Brown Bazzill Cardstock
Petite Scallop Circle Nestibilites
St. Bernard Stamp - Eat Cake Graphics
Prismacolor Premier Markers - color image
Sentiment - Unknown
Black Ribbon - Unknown
For background -
Crumple a piece of plain wax paper. Smooth out flat and place between two sheets of glossy cardstock, glossy side facing wax paper. Cover with towel. Heat with a hot (dry - no steam) iron. Let cool and remove. Rub Memento Rich Cocoa pad over glossy cardstock in large swathes. Cover to intensity desired and then wipe with paper towel. Cut background accordingly for project. (Here I used it as a background for my Saints card.) Enjoy!
Friday, September 11, 2009
Baby Blue Happy Birthday Card
I have been stuck in a creative rut? Anyone else ever been there? (I hear a collective sigh...) Too often I go to my baby blue paper stash when I need to make a baby card, specifically male. This time I decided to mix it up a little. I wanted to make a birthday card for a dear church friend. She has a wonderful calming effect on those around her. When life gets us down we call Brenda! I bet we all know someone like that. Well to celebrate a milestone birthday I created this baby blue card. Hope you like it! Thanks as always for looking.
Materials List
Bo-Bunny Shabby Princess Paper
Cardstock - Bazzill light blue, light green and white
Ionic Ticket Punch
Sentiment Stamp - Stampendous
Flower Stamp - Hero Arts
Stickles (center of flowers) - Waterfall
Ribbon - Stampin Up
Tuesday, September 8, 2009
Hello Flap Card
Materials List
Bazzill Cardstock - blue, green and white
Hero Arts Stamps - Birds and Butterflies set - background
Friend set - butterfly
Feathergrass set - Flourish and Hello sentiment
Memento Dew Drop Ink - Bamboo Leaves, Bahama, Black Tuxedo
Sponge Dauber
Dew Drops by Robins Nest
Mini Glue dots
1. Stamp background paper (4.25 X 5.5) and stamp butterfly background repeatedly
2. Cut a piece of white cardstock to 7" X 2". Score a line 2" from one end and
round the other two ends
3. On bottom of white cardstock stamp flourish with green ink. Stamp two
butterflies on a scrap piece of paper with black ink. When dry sponge daub with
blue ink and cut butterflies out
4. Put adhesive on back of white flap and adhere to back of blue stamped
cardstock. Place a larger white mat on the back. The flap will be sandwiched
between the blue cardstock and the white mat
5. Adhere butter flies to card randomly with mini glue dots. Spread wings outward
to simulate flight. Stamp hello sentiment on bottom of card.
6. Attach remaining dew drop embellishments to bottom of flap.
7. Cut a 5.25" X 2.25" piece from the green cardstock. Round the bottom two
corners and adhere under the white flap (this is where you will put the msge)
Wednesday, September 2, 2009
The Flowerpot Card
I love crafting messageboards! The crafters are amazing... I saw this idea recently on the Cricut messageboard and decided to copy. I definitely could not come up with something this amazing! I wonder if I can make a Christmas present card like this?
Materials
Bazzill Cardstock - Green, Brown and Yellow
Paper - unknown
Cricut Cartridges - Walk in my Garden (sunflower cut at 8 1/2 inches, flower pot at 4 1/2 inches George - tag cut at 4 inches
Martha Stewart Limited Edition 2009 Valentine Punch
Stamp sentiment - unknown
Ribbon - unknown
Cuttlebug folder - Swiss Dots - center of sunflower
Monday, August 31, 2009
Sweet As Pie Card
Nothing is better than eating a piece of freshly baked cherry pie... unless you are scrappin about one! Makes me want to bake one up right now! Enjoy!
Materials List
Bazzill Cardstock Red and White
Printed Paper Bo Bunny Shabby Princess Line
Judikins Diamond Glaze (applied to pie plate)
Ribbon - Stampin Up
Sentiment and Image stamps - Hero Arts
Prismacolor Premiere Markers (color pie image)
Memento Ink - Tuxedo Black
Spellbinders Nestabilities Petite Scalloped Large Circles
Tonic Ticket Punch Edger
Sunday, August 30, 2009
Winter Wishes Card
Yes, I am pushing the seasons! We are having such lovely fall like weather in Kentucky that my thoughts have turned to winter...
Materials List
Bazzill Cardstock - red and white
Adornit Carolee's Creations - snowflake paper
Memento Dew Drops - Lady Bug
Stamps snowflake and sentiment - Unknown
Martha Stewart Edger Punch - Icicles
Martha Stewart Limited Edition 2008 Snowflake Punch
Stickles - Diamond
Cricut Cartridge - A Child's Year
Versamark
Stamp N Stuff Embossing Powder - Winter Wonderland
1. Use Memento ink to randomly stamp snowflake images on red cardstock.
2. Cut various snowflake images from A Child's Year cartridge using patterned paper
(vary sizes)
3. Punch snowflake images from MS punch. Apply stickles.
4. Ink edges of snowflakes from Cricut cuts.
5. Cut white strip of cardstock and edge with icicle punch. Apply to card.
6. Adhere patterned paper snowflakes to white cardstock with pop dots. Add
smaller punched snowflakes to top.
7. Emboss sentiment on card. Decorate icicles with stickles and let dry!
Saturday, August 29, 2009
Seize the Cupcake!
Words to live by... Who needs vegetables? Hope this brings a smile to a little girl's face on her birthday!
Materials list -
Bazzill Cardstock - White and Pink
Ribbon - Unknown
Stamps - Hero Arts
Memento Ink - Tuxedo Black
Sargent Arts Watercolor Pencils
Dove Blender Pen
Sakura Gelly Roll Clear Star Pen - cupcake liner
Judi Kins Diamond Glaze - Cherry
Spellbinders Nestabilities Standard Circles Large and Petite Scalloped Circles Large
Cuttlebug Swiss Dots Embossing Folder
Thursday, August 27, 2009
Sea Salt Technique
Today's post is a little something different. I recently saw a piece in a magazine about creating your own paper designs with salt. I decided to try this technique with a Halloween card. The photo does not show it off. The yellow color is a lovely mottled look. I tried it with black and that REALLY popped! Here is how you do it!
1. Saturate a piece of glossy card stock with ink (for this I used Memento Dew Drops in Canteloupe
2. Spritz the paper with a couple of light mists of water. I used a Mini Mister by Ranger Inks
3. Lightly cover paper with coarse sea salt (I used Morton's)
4. Let paper dry overnight.
5. Brush salt (now colored) off paper and design away! Thanks for looking!
Monday, August 24, 2009
Halloween Treat Bag
I am all about simple... After working 9 hour days and commuting 2 1/2 hours I NEED simple projects! This one fits the bill. The image is from the Studio G collection. I bought these stamps in a set for $1. Can't beat that! The package is the purse from Tags, Bags, Boxes and More set at 5 inches. The embellishment is from the Accent Essentials cartridge at 3 inches.... stamp, cut, glue and go! I added a cute piece of ribbon for the handle! Voila! Simple and quick... If only laundry would go so quickly!
Thursday, August 20, 2009
Cricut Expression 101 Class
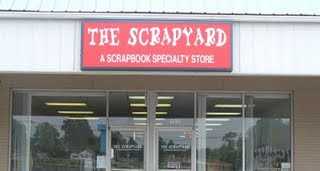
I will be teaching a Cricut Expression 101 class at my LSS The Scrapyard in Maysville, Kentucky. If you are in the area and would like to join let Diane know. The class will meet Saturday August 29 at 1PM. Please visit Diane's blog for details about her awesome new store! It's where I do all my shopping!
thescrapyardinmaysville.blogspot.com
Monday, August 17, 2009
Prim and Proper
I love the prim look as many people do. I have a coverlet on my dining room table that I simply love. It is black and gold. On a whim, I decided to replicate the look for a card. Hope you enjoy!
Supplies
Black and Ivory Cardstock
Snowflakes - Martha Stewart Limited Edition Punch 08
Octagon - Cricut George cart
Dots - hole punch
Medallions - Cricut Accent Essentials
Black Pen
Sheep Stamp
Primitive Blessings sentiment Microsoft Word
Saturday, August 15, 2009
Happy Fall Y'all!
I am trying to go outside my comfort zone... mixing different elements and patterned paper! Sometimes we have to force ourselves outside the box!
Patterned Paper - Scenic Route
Cardstock - Bazzill
Sentiment - Microsoft Andy font
Owl Stamp - Hero Arts
Diecuts
Birdhouse - Stretch your Imagination
Mailbox - Jubilee
Pumpkins - Pooh and Friends (pumpkin shadow - chipboard painted)
New Kitty Card
A pet is a huge responsibility! A young friend of mine recently received her first kitten. I created this card to celebrate such a momentous moment... Kaycee is growing up so fast!
Supplies
Bazzill Dot Paper
Bazzill Cardstock
Die Cut - A Child's Year - Provocraft
Ribbon - Stampin Up
Sentiment - Unknown
Inking - Cat's Eye chalk - Chestnut
Sunday, August 9, 2009
Friendship Card - St. Bernard Theme
I love my Saints! And I love my friends. It stands to reason the two would come together in some form of card! I recently purchased some stamps from Eat Cake Graphics and was dying to try them out. I used Premier Markers to color the image, Nestabilities to emboss and cut the image. My trusty Cricut provided the dog bone (Mickey and Friends). I couldn't resist using the new Martha Stewart drippy goo punch to give it that Beethoven feel... My Saints are offended by this analogy... Thanks for looking and have a great week!
Blog Award
I have received my first "blog award!" Thanks to Nita at nitasjoy.blogspot for this award. Please take time to visit her site and check out some cool creations. The rule of this award is to post 15 new blogs you have discovered and pass the award on. Watch my blog in the coming week for my selections! Thanks again Nita!
Wednesday, August 5, 2009
Witchy Moon Halloween Card
Monday, August 3, 2009
Caramel Apple Invite
I am noticing a trend in my posts... food! In the last few days I have created pumpkins, popsicles and even cupcakes. However, nothing can compare to this food creation... a caramel apple. The one food item that screams fall! I love caramel apples! Sometimes we visit a local apple grove and pick up a back of fresh apples and cider. If I am really good I treat myself to a caramel apple. Well, maybe I don't have to be good to treat myself... LOL We are planning a small family gathering at our farm this year and I wanted to create an invitation that embraces the season. Take time to enjoy your family this fall and seize the day!
Sunday, August 2, 2009
Autumn Card
It is August 2nd in Kentucky... time when you can fry an egg on the sidewalk, right? Wrong! July was the 2nd coolest on record. We have had only 2 days this year that we reached 90 degrees. This week we expect another round of cool temperatures. My body and my St. Bernards are completely puzzled by this weather... loving it, but puzzled nonetheless! So to celebrate the premature fall-like weather, I created an autumn card. I really wanted to use my Cuttlebug Pumpkins embossing folder and needed an excuse to do it... LOL. I colored the image with Prisma markers. I always loved to color as a child. Some things never change, right? Hope you are making the best of your weather!
Saturday, August 1, 2009
Summer Time Card
I love popsicles! There I said it. I am probably way too old to admit such affection for a childhood treat. But maybe this is the first step to my recovery. LOL And as bizarre as it sounds, I really like the blue popsicles... you know, the ones that have every artificial preservative and coloring known to man! I have had this paper from Bo Bunny forever. I intended to create an Easter layout with it. But life got in the way, so instead I am mixing up the traditional colors of summer by using pastels. I used the Cuttlebug Swirls embossing folder along with Stampin Up ribbon. The sentiment is highlighted with a glitter pen and Robin's Nest Dew Drops. Thanks for looking and take time to enjoy your childhood pleasure!
Wednesday, July 29, 2009
I Love Summer!
Summer is the best time of year... time at the beach... sightseeing... lounging by the pool. I created a card to celebrate my love of sun and fun. The watermelon was created using the Cricut George cart. The "seeds" are Robin's Nest dew drops. The fence was created using a Martha Stewart punch. Hope you are having a great summer too!
Sunday, July 26, 2009
The cherry on top...
I need to use up some old pattern paper. I have tons of it. I love it all but I have entirely too much! I wanted to make an early sweetest card. Immediately I knew I wanted something sappy and sweet on the front. The Cricut Home Decor cartridge has a wonderful image of a cupcake... and thus began this card. The paper is from Chatterbox. I love the soft colors. They remind me of sherbert. The ribbon is from Stampin Up and the embellishments are Robin's Nest Dew Drops. The sentiment is from a new set of Hero Arts stamps. And the cherry on top looks real. I used acrylic dimensional lacquer to achieve the look. The whole card looks good enough to eat!
Saturday, July 25, 2009
Cleaning out creative cobwebs...
I don't do Halloween... literally... but I had to try my hand at creating a spooky card. After seeing the fun images on the new A Child's Year cartridge, I decided to try my hand at creating something spooktacular! It may not be all that but I think it turned out nicely. The background is embossed with the Cuttlebug Cobweb image and the sentiment was stamped on white cardstock. I cut a second image of the girl in order to attach the pumpkin. The ribbon was from a long forgotten stash. Maybe this won't be my last Halloween card... Mummies, spiders and pumpkins, oh my!
Subscribe to:
Posts (Atom)
Surprise!!! It's Best Bunny!
There is something about Granny Apple Green that just brings a smile to my face! When the first signs of Spring appear you are sure to see...
-
I am so excited today to be posting a special Birthday Wish to Our Daily Bread designs owner, Kelley Holland ! This is a very specia...
-
Welcome to the Our Daily Bread designs 4th Anniversary Special Design Team Edition Release Blog Hop ! If you got here from Suzanne's B...
-
Hello friends! Welcome to the Our Daily Bread designs November Release Blog Hop! If you got here from Silke’s blog , you are in the righ...