Saturday, November 30, 2013

Exploring Cricut ~ Christmas Blessings ~

Good morning!  Thanks for joining me for
another great Exploring Cricut post! 
 
This week I am featuring a card project!  With Christmas on the horizon, I need more cards in my stash!  So I pulled out my Winter Woodland cartridge and went to work...
 
 
I chose a snowflake cut (page 35) and cut it at 4.5 and 2.5 inches.  They are stacked on top of each other with dimensional foam.  The card base (white CS) is 5.5 x 4.25 inches with a dark red CS matting.  I chose some DP by Teresa Collins and hand cut the zig zag border following the design.  I added the snowflake, stamped my sentiment on white CS and hand cut a banner.  The final touch...  a white button with a bit of red & white jute for a jaunty finish! 
 
Thanks for joining me!  Don't forget to stop back by tomorrow as we celebrate Our Daily Bread Designs' December release! 
 
{hugs}
 
Supplies 
 
Cricut Cartridge - Winter Woodland
Stamps - Our Daily Bread Designs - Vintage Pattern Ornaments
Ink - Memento - Rhubarb Stalk
Paper - Georgia Pacific, The Paper Studio, Teresa Collins - Santa's List
Misc. - Jillibean Soup - Baker's Twine, Button 

Wednesday, November 27, 2013

WAW108 ~ Fear of the Lord ~

Welcome!  It's time for another 
inspirational challenge at Word Art Wednesday.  

Check out the WAW site for all the details including this week's digital scripture image, how to link your creation AND info on our fabulous prizes! 
 
A special thank you to both My Craft Spot and Cynthia Milan with Close To My Heart
 for providing our prizes this week!

This week we are featuring a scripture from Proverbs...

 
based on the MOJO 321 sketch shown below...


and inspired by The Shabby Tea Room #194 "Christmas is Coming" Challenge

Inspiration Photo below
and use Brown, White & Red


Thanks for stopping by!  Praying you have a wonderful Thanksgiving filled with love, family and friends!  Be safe!  {{hugs}}

Lori

Card Recipe

Paper - The Paper Studio, Georgia Pacific, K & Company - Christmas Cheer, Fancypantsdesigns - Home For Christmas
Dies - Spellbinders Standard Circles Small & Stately Circles
Misc. - Recollections Ribbon & Clock Embellishment
 

Friday, November 22, 2013

A Look Back at ODBD's November Release

Happy Friday!  Today we are taking a look back at Our Daily Bread Designs' November Release.  It's hard to believe the month is nearly over!  Thanksgiving will be here soon and then Christmas!  In honor of our Savior's birth, I created a card using the Poinsettia Wreath  stamp and coordinating Poinsettia Wreath Die.


For more inspiration using the November Release be sure to visit the ODBD Blog.
 
Here are the products I used today...
 
Poinsettia Wreath stamp set
 

and coordinating

 
And if you look closely you will find an older release,


First I created my card base using a shaped die.  I then used my Quatrefoil Pattern Die to cut out another layer and used the shaped die to create a lattice layer.  If you look closely you will see I placed tiny adhesive pearls at the center of each quatrefoil.  I used the same shaped die that created the base (in two graduated sizes) to create a frame and added it with dimensional foam to the top.  I stamped the sentiment (black ink) on white card stock and used a label shaped die to create the sentiment panel.  I stamped the image on Copic compatible paper before coloring the greenery with a combo of YG17 and YG67.  I used R24 and R27 for the poinsettias and a mixture of G24 and Y17 for the centers.  After coloring, I used the coordinating die to cut out the image and added it (slightly above the top card edge) with dimensional foam.  I like how it elongates the card by placing it a bit off the page.  So what do you think?  
 
If you haven't had a chance to see what the other "Sticks" have created please check out the links below!  They are one talented group of God fearing ladies!  {{hugs}}


Grace * Julie * Angie * Dawn *
Chris * Cathy * Sabrina * Sandee * Lori


Tuesday, November 19, 2013

ODBD ~ Glory ~

Good Morning!  I'm stopping in with another clean and simple card featuring Our Daily Bread Designs', The Earth set.  I stamped the globe image on Kraft and created my own custom designer paper.


See the globe image peeking out at you?  I ripped some memo paper out of a pad I use to jot down craft notes and used a paper punch to create the spirals.  I embossed the sentiment (Ranger's Queens' Gold) on coordinating blue card stock and framed it with a Spellbinder die.  Another speedy card!  Love those!  Thanks for hanging out with me today!  Don't forget to stop by later this week as we revisit this month's Our Daily Bread Designs release.  It promises to be a great day!  {{hugs}}


Additional Supplies
 
Paper - The Paper Studio, Bazzill, Memo Paper
Ink - Versamark, Memento Rich Cocoa
Embossing Powder - Ranger's Queens' Gold


Monday, November 18, 2013

CTMH ~ Faith Shines Bright ~

Happy Monday!  Hope this bright morning finds you well!  Today, I have a card to share using Close To My Heart's stamp of the month, Illuminate.  I purchased this recently from a good friend, Emily and decided to create a clean and simple card.  How did I do?


I stamped the light post in black and added the lantern before coloring the image lightly with Y35.  I added just a bit of Stardust Stickles for a bit of pizzaz.  I also used my much ignored corner rounder to kick it up a notch.  I stamped the sentiment on white card stock along with the "glow" and colored it with the yellow Copic also.  I cut it with a Spellbinder die and added a coordinating scalloped black die to make it pop!  Super easy!  I just might take this clean and simple thing to heart!  ;-) 
 
Be sure to hop over and check out what the Exploring Cricut
crew has to show you today.  I normally post for their challenges but couldn't this week due to illness.  **sniff**  I know Diane and company have a super fun challenge for ya!
 
Till next time...
 
Blessings...
 
Supplies
 
Stamps - Close To My Heart - Illuminate
Ink - Memento Tuxedo Black, Copics Y35
Papers - Neenah Solar Crest, Bazzill, Georgia Pacific
Misc. - Spellbinders Classic Ovals Small & Classic Scalloped Ovals Small

Sunday, November 17, 2013

~ A Little Bit of Green and Remaining Focused ~

Good morning!  Thanks as always for stopping by!  I have a wonderful card to share using Our Daily Bread Designs' November release, Poinsettia Wreath.  I love this time of year and I have already started a projects around the house.  I love Christmas and all of the decorating that goes with it!  Last year was a difficult year as I found myself struggling to even put up one tree!  This year I feel SO MUCH better and PRAISE God for his many mercies!  I just know this will be the best one yet! 
 
I wanted to share a funny story before diving into today's card.  A few weeks back, hubs and I were doing some long neglected outside chores.  I glanced up to see one of our ewes (female sheep) bleating frantically and running alongside the fence.  Thinking there might be a predator about, I rushed over to the field to see why she was so distressed.  I realized that there were ZERO sheep anywhere to be found!  After scanning the field, I realized this poor little girl had gone to sleep and the rest of the flock woke up and promptly went out to graze.  She couldn't see them and they couldn't hear her cries.  If you know anything about sheep at all, you know they have an incredible herding instinct.  They stay together for safety and security and get very nervous by themselves.  This little dear had taken her eyes off the prize so to speak and as a result was left behind.  Do you see where I'm going with this friends? 
 
If we fail to keep our eyes on the prize (Jesus), we get easily distracted.  I admit, I am guilty of this.  And it is so easy to look up, panic, and then frantically try to find him in our times of distress.  Fact is, he was there all the time!  He NEVER leaves us!  We just took our eyes off of him!  Thanks for reading...
 
Today's card...

 
 featuring Poinsettia Wreath


I used Kraft for my card base and added a layer of red card stock, scored at 1 inch intervals.  I wanted to create a background that resembled clapboard.  I then ran a distress ink pad lightly over the red piece to age it and define the score marks.  I used the Cathedral Window and Border Dies set to create my window (including an illuminated yellow interior) and frame.  I added the frame with dimensional foam to give it a realistic feel.  I colored the wreath with Copics and cut an additional poinsettia image and ribbon to add for dimension.  After completing those cuts and assembling my wreath, I added it to the "window."  So cute! 
 
Thanks so much for stopping by!  Until next time...
 
Blessings...
 
 
Additional Products
 
Paper - Neenah Solar Crest, The Paper Studio, Bazzill
Ink - Memento Tuxedo Black, Copics, Ranger Distress Ink - Tea Dye
Misc. - ScorPal

Saturday, November 16, 2013

Exploring Cricut ~ Burlap and Monograms ~

Good morning!  Thanks for joining me for
another great Exploring Cricut post! 
 
This week I am featuring a home décor project!  I needed a cute garden flag for my front door and since I love burlap I started a search for one.  Unfortunately, the ones I found on Etsy were pretty pricey. I decided to make my own!  So I pulled out my trusty Cricut and went to work!
 
 
I measured out my burlap and cut it to 13 by 17 inches.  I folded one end over about 2 1/4 inches and used a zigzag stitch to secure the sleeve.  I then stitched around the entire project at roughly 1 inch.  I secured Heat & Bond (following manufacturer's instructions) to the back of black felt and used a brayer to secure it to a sticky mat.  I cut the monogram (11 inches) using the multi-cut function to make sure it was cut through.  I then turned the flag over on the back side (on top of the monogram) and used a medium heat iron to heat and secure.  Super easy!  I may try making one of these for my Mom.  SHHH!!!  Don't tell her!  Have a wonderful day!
 
Supplies
 
Cricut Cartridge - Basecamp
Material - Burlap, Black Felt
Misc. - Heat & Bond, Sewing Machine    
 

Friday, November 15, 2013

North Coast Creations' November Release

Welcome to the North Coast Creations November New Releases!  We will be choosing 2 winners who will receive a $10 gift certificate to the store for stamps just for commenting on our Design Team cards! You have until November 17, 2013 at 10:00PM EST to make a comment on each of our designers blog posts.  Our 2 random winners will be announced on the North Coast Creations Blog on November 18, 2013.

Here's the new stamp set featuring Santa Paws, lovingly colored to resemble a Golden Retriever...


and Santa Claws looking like the mischievous kitten...


Some of the products I used...


Thanks for stopping by!  If you get lost along the way be sure to visit the NCC Blog.
 
And here are the links of my fellow "Coasters" so you can play along...  {{hugs}}
 
DT Links:
 
Lisa * Dawn * Julie * Amber * Lori (You are here) * Cindy
 

Supplies
Woof Top

Papers - Bazzill, Our Daily Bread Designs Christmas Paper Collection 2013
Ink - Memento Tuxedo Black, Copics
Die - Spellbinders Fancy Ovals
Misc. - Pearls by Recollections, Ribbon

Supplies
Meowy Christmas

Papers - Bazzill, The Paper Studio
Ink - Versamark, Memento Tuxedo Blck, Copics
Dies - Our Daily Bread Designs Ornament Circles Die, Spellbinders Standard Circles Large
Misc. - Sequins
 
Challenges


Wednesday, November 13, 2013

WAW106 ~ Love.. in Deed and in Truth ~

Welcome!  It's time for another 
inspirational challenge at Word Art Wednesday.  

Check out the WAW site for all the details including this week's digital scripture image, how to link your creation AND info on our fabulous prizes! 
 
A special thank you to both My Creative Classroom and 
Paper Sweeties, for providing our prizes this week!
 
This week we feature a beautiful passage from 1 John...


I printed the scripture on DP resembling notebook paper and used a rectangular die to cut it skewed.  This week I incorporated a sketch and used a large floral print on the left and a simple polka dot paper on the right dividing the two with white seam binding.  I added a seam binding bow along with die cut foliage and some mulberry roses.   A few paper punched twigs are tucked in for dimension. 

I don't normally go with "pink" things this time of year but I just couldn't help myself!  :-)  No other color reminds me of love like pink...  I had to use it!  Thanks for stopping in!  {{hugs}}

Supplies

Paper - Bazzill, Georgia Pacific, Simple Stories Vintage Bliss
Dies - Spellbinders Classic Rectangles Large, Our Daily Bread Designs - Fancy Foliage Die
Misc. - Martha Stewart Crafts Punch, Hug Snug White Seam Binding, Mulberry Roses

Challenges

The Deconstructed Sketch - DS126

Monday, November 11, 2013

~The Earth ~

It is hard to believe that Monday has rolled back around!  Hubs and I spent a nice three day weekend taking care of some long neglected chores around our place.  We replaced some light bulbs in the barn (the sheep are SO glad to no longer be in the dark), repaired some minor storm damage and trimmed trees!  We accomplished a great deal and it was wonderful to sink into bed each night praising God for His mercies and the ability to do such simple tasks. 
 
You see, a year ago things were not so easy.  John was suffering terribly from two deteriorating knees and I was battling what I thought was a persistent cold.  Poor John was unable to do the simplest of tasks including working with our dogs and I was barely able to get out of a chair.  And during the physical storm, I was battling a deep emotional storm.  When you are an active person, the loss of your strength really hits you hard.  The devil was delighting in the torments we both suffered, preying on our weakness. 
 
This year has been a very good one!  So it is with great joy, that I celebrate this year, one filled with good health and new knees for my dear husband.  Many people prayed for us both and I want to thank each and every one for lifting us up in their daily petitions.  I praise our Lord, who carried us through yet another storm of life.  I thank Him for giving us both healing and strength to carry on. 
 
 Doing all those menial tasks wasn't so menial after all!  They marked a milestone for us both...  a celebration of where we were and where God has taken us!  Thank you Lord Jesus for loving me and allowing me to be a part of your everything!  Isn't it wonderful to know He loved us that much? 
 
Today's stamp features Our Daily Bread Designs' The Earth and coordinating die, Circle Ornaments.  The scripture is from Psalm 24:1  "The earth is the Lord's and everything in it."  I embossed it in gold after stamping the globe image on light blue paper. 


and a photo of the die and stamp set...


And of course I used the Fancy Foliage die to create the leaves for the floral spray...


Thank you so much for stopping by and bless you for sharing your day!  I love reading your comments and words of encouragement.  They never fail to bless me!  {{hugs}}
 
Lori

Friday, November 8, 2013

Christmas Patterns by ODBD

Welcome!  Thank you for stopping by and sharing a bit of your morning with me.  I am excited to share a card using Our Daily Bread Designs' new release, Christmas Pattern Ornaments.  What is so cool about this stamp set is that ODBD created a coordinating die set, Circle Ornaments.  It is SO much easier when everything works together!  What's really great about this set?  It not only provides the perfect circle dies to complement the ornaments BUT it also includes the cute holly leaf die you see used below!  I opted to used a few strategically placed red sequins to create the berries but the die set has those too!!!!   
 
For this project I embossed both ornaments, one with a dark green powder on white card stock and the other with gold on green CS.  The cute designer paper is also by Our Daily Bread Designs! 


So here are the products you see used today...


and this fun paper set
 
 
Thanks again for stopping by!  Until next time...
 
Blessings...
 
Additional Supplies
 
Ink - Versamark
Embossing Powders - Ranger Queen's Gold, Stampendous
Misc. - Sequins
Paper - Bazzill, Georgia Pacific

Wednesday, November 6, 2013

WAW105 ~ Hold My Hand ~

Welcome!  It's time for another 
inspirational challenge at Word Art Wednesday.  

Check out the WAW site for all the details including this week's digital scripture image, how to link your creation AND info on our fabulous prizes! 
 
A special thank you to both Mark's Finest Papers and
 Robyn's Fetish,
 for providing our prizes this week!
 
This week we feature an amazing passage from the book of Isaiah...


I love the vintage feel of this design based on this week's Deconstructed Sketch.  I printed our scripture on DP and matted all layers with black card stock.  The base (also black CS) measures 5.5 x 4.25 inches.  I used a cream colored mulberry rose and paper punched leaves/twigs to create a lovely floral spray on top. 

This scripture touched my heart today and reminded me just how special it is to know our Savior is with us every step of the way.  He holds my hand no matter what my troubles might be!  What a blessing! 

Thanks as always for stopping by!  Have a wonderful and blessed day!

Lori

Supplies

Paper - Georgia Pacific, Recollections Fall Paper Pad, Bazzill Basics Paper Antique Aged Papers
Inks - Ranger Distress Ink - Black Soot
Misc. - Mulberry Rose, Martha Stewart Crafts - Paper Punches

Challenges

The Deconstructed Sketch - DS125

DS125
 

Tuesday, November 5, 2013

A Look Back at North Coast Creations' October Release

Today we are taking a look back at North Coast Creations' October Release!  Can you believe that November is already here?  Today, I'm sharing a card I created using the Let it Snow stamp set.  For more inspiration using the October Release be sure to visit the NCC Blog.

Here's my dancing/juggling snowman...

 
I stamped the image on Copic compatible paper and lightly colored my image.  I also added a light blue ink (sponged) onto the background to create a faux sky.  I opted to add three strategic sequins above the snowman.  It almost looks like he is juggling!  A die cut snowflake (from Our Daily Bread Designs' Snowflake Die set) adorns the upper corner.  So fun!

Let's review the products I used...

Let it Snow from NCC


and Our Daily Bread Designs' Snowflake Dies

CSBD4 - SNOWFLAKE DIES

Be sure to check out the other team members' creations!  There is a whole lot of beauty to behold!  Thanks for stopping by! 
 
 Julie * Lisa * Dawn 
 Sandee * Lori * Cindy

Challenges

RS88 - Retro Sketch


Monday, November 4, 2013

Exploring Cricut ~ Cricut Choice Challenge ~

Welcome to another fun bi-weekly challenge at
Exploring Cricut
 
The challenge this week....
 
 Make a card, layout, or paper craft using
1 pattern paper, 2 cricut cuts and 3 colors. 
It can be any
theme!

This week I chose to work with French Manor and Nursery Rhymes to create this cute thank you card!


I cut the rooster at 4.5 inches (Shadow and figure).  It came from Nursery Rhymes.  I then cut the sentiment at 1.5 inches. (From French Manor...)  The pattern paper I chose is actually from a Christmas paper pad.  But I really like the paisley design and thought it worked nicely with my theme.  I then used one red sequin to dot the I in Merci. 

Thanks for stopping by!  And until next time....

Blessings...

Supplies

Cartridges - Cricut French Manor and Nursery Rhymes
Papers - Bazzill, Georgia Pacific, K & Company
 

Saturday, November 2, 2013

Exploring Cricut ~ Foxy Lady ~

Good morning!  Thanks for joining me for another great Exploring Cricut post!  I must admit that crazy new song about what a fox says...  you know the one...  is driving me crazy!  I'm not sure it's the melody so much as the topic.  lol...  So this little gem will go to a dear friend.  She is one foxy lady!  :-) 
 
I used Give a Hoot for this project and all cuts are 4.25 inches. 


For my card base I used simple white CS and measured out a card approximately 5.25 x 5.25 inches.  I cut a fun DP (flowers already included) and added it for my background.  The fox took three card stock colors...  black, white and a rust orange.  Super cute!  I love simple projects! 
 
Thanks for stopping by and exactly what does the fox say?????

 
Cartridge - Cricut Give a Hoot
Papers - Bazzill, Colorbok Natural Expressions Pack

Friday, November 1, 2013

Welcome to Our Daily Bread Designs' November Release

Welcome to Our Daily Bread Designs' November New Release Hop! 

Can you believe it is November?  Wow!  Where has the year gone?  Well, with a new month I get to share some new stamps by Our Daily Bread Designs!  And if you participate in our hop, you can share in the fun too! 

One winner will be randomly chosen from one of the designers blog comments to receive a $50 Gift Certificate to the ODBD Store, to be used toward the purchase of ODBD Stamps.  You have until November 2, 2013 at 9:00 p.m. EST to make your comments!  The winner will be posted on the ODBD Blog on November 3rd, so be sure to check back there to see if you won!  

 Normally, I share a couple of cards with you but this time I had such a hard time choosing... 

I picked 3!!!!!  ;-)


This white dream features the new stamp set, Vintage Pattern Ornaments and a new die set, Circle Ornaments.  I embossed the top layer with a snowflake pattern before adding Glimmer Mist and a few pearls.  I stamped the ornament image on white paper with an aqua colored ink and used the Circle Ornaments die set to create a silver bale AND cut the ornament out.  I stamped the sentiment with a watermark ink and embossed it with silver before cutting it with a ribbon like die and adhering.  So cute!

And then I couldn't resist using the Circle Ornaments set AND the new 2013 Christmas Paper Collection for a fun stair step card...


This time, I embossed both ornaments with silver embossing powder.  I created one on black card stock and the other on white.  I used the Circle Ornaments die to create the bale and ornament PLUS the holly!  I love die sets that are SO versatile!  The sentiment was stamped in black ink on some beautiful snowflake paper from Our Daily Bread Designs' 2013 Christmas Paper Collection.  I just love the new paper too!  ***Hint***  The papers coordinate beautifully with many of the ODBD sets you already own!!!!  ;-)

And for my final project, a clean and simple gem using a fun sketch and the new set, The Earth...


I stamped the image, from The Earth set,
 in black on white Copic compatible paper and after coloring embossed it in gold.  I used ODBD's Circle Ornaments die to cut the globe out slightly smaller than the image.  I added a few nontraditional colors (pink & green) to add a bit of interest.  I call this my green card...  mock page print, pink & green...  reminds me just how precious our Creator's creation is! 

So here's the ODBD products I used today...

Vintage Pattern Ornaments


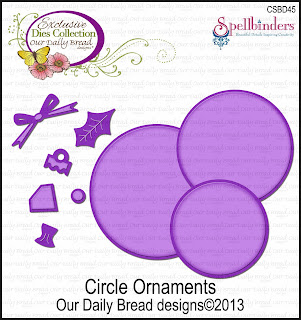
Circle Ornaments


2013 Christmas Paper Collection


 The Earth

 
Aren't they amazing???  Thanks so much for stopping by and don't forget to leave some love on my sisters' blogs!  Remember...  Kelley will be drawing from your comments for a prize!  Thanks again! 

{{hugs}}

* Dawn * Grace * Sandee * Lisa * Chris * Angie * Julie * Silke * Cathy * Lori (YOU ARE HERE) * Tosha * Sabrina *Audrey *ODBD Blog *

Challenges

MOJO317

 
 Crazy 4 Challenges -
 CFC209 - Favorite set - Vintage Ornaments

Surprise!!! It's Best Bunny!

There is something about Granny Apple Green that just brings a smile to my face!  When the first signs of Spring appear you are sure to see...