Showing posts with label Stamps - Stampin' Up. Show all posts

Thursday, September 15, 2016

MOJO465 ~ For You ~

Good morning!  Today I have a fun card to share with a decidedly fall feel.  I also took a few moments to play along with one of weekly challenges I love to do...  MOJO Monday!  

And to make it even more fun, I worked in some fall plaid plus a fun sweater print DP!  I'm not wild about the cooler weather AND winter that inevitably follows!  But I sure do love the textures and textiles of the season!


and the sketch it is based on...MOJO465...


So I started with a black card stock base (4.25 x 5.5 inches).  I added a slightly smaller plaid print from Jen Hadfield's Warm & Cozy Paper Collection.  I added a couple of coordinating panels (also matted in black) stamping my sentiment on the lower right hand side.  I created the tree using Stampin' Up's Thoughtful Branches stamp set and Beautiful Branches Thinlits Dies.  A bit of baker's twine ties if all up.  And in the corner I added a black bird (envision a crow) heading off to search for fall goodies!  

Thanks so much for stopping by!  Don't forget to peek back in Friday as we take a look back at this month's release from Our Daily Bread Designs.  Blessings!

Wednesday, September 14, 2016

WAW 248 & 249 ~ Isaiah 54:10

Good morning and welcome to a new bi-weekly challenge at Word Art Wednesday!  This week we have a wonderful digital image featuring scripture from Proverbs.  To find the digi scripture featured and details of how you can play along in the #248-#249 challenge pop over to Word Art Wednesday for all the details.  But before you check it out, take a moment to look at the card I created using this week's featured digi!


Today's card is based on the weekly Retro Sketch shown here...


and the supplies you see here in addition to the Weekly Word Art scripture digi...

Stampin' Up - Foxy Friends stamp set
(fox stamped with Soft Suede Ink)
Designer Papers by Echo Park - Fall is in the Air Collection
Digi printed on white Georgia Pacific Card Stock
Card measures 5.5 by 4.25 folded, 8.5 inches before scoring
Ribbon - Misc Stash

Thanks for looking!  Until next time...
Blessings....

Wednesday, August 31, 2016

Word Art Wednesday ~ Anything Goes Challenge

Good morning and welcome to a new bi-weekly challenge at Word Art Wednesday!  This week we have a wonderful digital image featuring scripture from Proverbs.  To find the digi scripture featured and details of how you can play along in the #246-#247 challenge pop over to Word Art Wednesday for all the details.  But before you check it out, take a moment to look at the card I created using this week's featured digi!


I have enjoyed the pineapple trend this summer.  I love a fresh slice of pineapple particularly this time of year.  And when I saw this fun designer paper I had to put it in my cart...  lol

So here is the break down layer by layer...

White Card Stock (CS) 5.5 x 4.25 inches
Gold Paper Studio Poster Board
Bazzill CS and Our Daily Bread Designs' Pierced Rectangles Die
Gold Poster Board
Recollections Pineapple DP cut/embossed with ODBD's Pierced Rectangles Die
Gold Poster Board - ODBD's Oval Die
White Card Stock (printed scripture) - ODBD's Pierced Ovals Die
Pineapple image - Stampin' Up Pop of Paradise 
Die Cut by Dave's Die - Paradise Pop
Inks - Dew Drop Brilliance Galaxy Gold
Memento Bamboo Leaves

Thanks for stopping by and don't forget to pop by and visit the Word Art Wednesday site!  

Blessings...

Wednesday, July 6, 2016

Word Art Wednesday Challenge #238 and #239

Good morning and welcome to a new bi-weekly challenge at Word Art Wednesday!  I am still loving the red, white and blue papers I am seeing as of late.  So today, I pulled out some floral designs to work with.  I also opted to go with a cleaner look...  a bit more white space...


I started with a plain card stock base measuring 4.25 x 5.5 inches and added a fun pattern DP from Anna Griffin's Madison Paper pad.  I printed my scripture on white card stock and cut it down adding a slightly larger blue mat.  I pulled out a Stampin' Up stamp (Timeless Treasures) and added a but of distressed stamping with Sahara Sand ink.  I tied up a twine bow (maybe from the dollar bin at Michaels...) and added a simple ecru mulberry flower.  A few sequins adorn the corner....  (the white space scared me...  lol)

Thanks as always for joining me!  Don't forget to visit the WAW Blog to check out what the other designers have created.  Plus you can play along for the chance to win some fun prizes!  
Blessings!

Wednesday, June 29, 2016

~ A Few Roses and a Thank You ~

Last year my husband planted a beautiful pink rose in one of our back flower beds.  In my zeal to clean out noxious weeds, I accidentally loped off a pretty nice chunk earlier this spring...  rose buds and all...  ***Did I mention that I do not have a green thumb???***  In fact the running joke in our house is that I can create a paper rose easier than nurture a real one....  So in fear of repeating past mistakes and retribution from my husband, I swore off weeding after that fateful day.  And might I say, my flower beds were a WRECK!!!  So Friday night, I had reached my limit.  I saw the antique wagon wheel...  a few sunflower plants popping up...  a lovely pink rose AND the thickest patch of weeds I had ever seen!  I realized that my lovely sunflowers and roses were in perilous danger...  and not from me!  So I did what I had to do...  I dove in...  pulled weeds and thankfully my pink rose survived the encounter!

Today's cards features the kind of flower that is totally fail proof for me...  PAPER!!

  
I used a few items in my stash including a new paper pad I found recently at Jo Anns.  It is Anna Griffin's Juliet Paper Pad with some Real Red by Stampin' Up and a bit of green Bazzill card stock from my stash.  I started with an ecru paper base, a slightly smaller Real Red card stock mat, another mat of DP and a die cut border created with Stampin' Up's Botanical Builder Die.  I layered a bit of green card stock just under the negative to make it pop.  I stamped my leaf stamp (Botanical Blooms) with SU's Wild Wasabi on Pear Pizzaz CS.  I them used the coordinating Botanical Builders Framelits Die to cut it.  I used a bit of ecru CS and SU Blushing Bride along with the BB Framelits Die to create these lovely dimensional flowers.  I added a tiny pearl with adhesive to each center for interest.  I stamped the sentiment (SU's Rose Wonder) with Wild Wasabi ink on ecru CS and used the Rose Garden Thinlets Die to cut it out.  I added the final product with dimensional foam. 

I love flowers that are less complicated...  less demanding...  whew!!!!   

Thanks for stopping by!

Blessings!

Friday, June 24, 2016

~ Friends are Kind ~

For the most part friends are kind...  I have learned over the years that the ones who are not...  well it is best to part ways!  So in honor of all my friends who still manage to love me... here is a fun card featuring an unusual star...


I started with a white card stock base and added a mat using ODBD's Majestic Medallion Die and Smoky Slate card stock.  I used ODBD's Double Stitched Rectangles Die to create a mat and focal panel using Pool Party and Foxy Friends Paper Pad DP.  I stamped my sentiment with Versafine Black Onyx ink on white card stock and used ODBD's Double Stitched Circles Die to frame it.  A bit of black and white card stock plus a SU Punch helped me create my "little stinker."  

For my sentiment....  Stampin' Up - Garden In Bloom
Stampin' Up Punch - Fox Builder Punch
Stampin' Up - A Little Foxy 8 1/2 x 11 Card Stock
Stampin' Up - A Little Foxy Designer Series Paper Stack

Thanks for stopping by!  Until next time...

Blessings...


Wednesday, June 8, 2016

Word Art Wednesday Challenge 234 & 235 ~ Proverbs 16:9 ~

Good morning and welcome to a new bi-weekly challenge at Word Art Wednesday
 Today we have a beautiful scripture from the book of Proverbs.  This one is perfect for that man in your life!  I lost my own father 20 years ago this May.  There isn't a day that goes by I don't think about him.  And what I wouldn't give to hear his voice one more time!  Give Dad a big kiss and hug!  Call him up or better yet, go VISIT!   With Father's Day just around the bend it is so important to show our earthly Fathers just how much of a blessing they are!
  

I decided to work with some different mediums and products today.  I printed this week's digital scripture on white card stock before using Our Daily Bread Designs' Pierced Rectangles Die to frame it.  I cut a slightly larger mat from Stampin' Up's Always Artichoke Card Stock before adding to the Georgia Pacific Black Card Stock base (4.25 x 5.5 inches).  I used a couple of traditional stamp sets to complement this scripture panel.  As I reflected upon the passage, I couldn't help thing of how man is always dreaming of big things (ex. the Wright Brothers and flight) but yet it is God who is in control.  It is always in His time.  

I stamped the trees (SU Always Artichoke ink) on the corner.  (The image is from SU's Wonderland Set.)  I added a lovely vintage plane stamp from SU's Sale-A-Bration set, Sky is the Limit (SU Basic Black ink).  I colored the plane lightly with Prismacolor pencils adding a blender for depth and added a bit of clear Wink of Stella glitter ink to the propeller.  I used a scallop punch and Memento's Summer Sky ink to create my puffy sky.  

Thanks as always for joining me and don't forget to go to the Word Art Wednesday blog to pick up this beautiful scripture (for FREE) and play along with our challenge!

Taking a chance to play along with

 Paper Players PP298 - Father's Day Challenge


Blessings...

Lori 

Saturday, May 28, 2016

CTD394 ~ Wishing ~

Today's card is for the weekly Color Throwdown.  The challenge this time...  to use the following inspiration photo...


and the Challenge LINK

I opted to go with a very simple palette of navy, red and soft pink...


I started with a white card stock base measuring 4.25 x 11 inches, scored and folded at 5.5 inches.  I cut a slightly smaller mat out of Night of Navy CS (by Stampin' Up).  I stamped my image (SU's Sheltering Tree set) on white card stock using Pink Pirouette, Sahara Sand and Soft Suede inks, all by Stampin' Up.  I die cut the image using Our Daily Bread Designs' Double Stitched Rectangles Die and cut a slightly smaller Night of Navy CS mat.  (The navy mat is double with a bit of dimensional foam between...)  I finished with a Real Red CS die cut word using ODBD's Wishing Die.  

Love this clean and simple image and color scheme...

Thanks for looking...  

Until next time...

Blessings...

Wednesday, February 3, 2016

WAW219 ~ I Am the Way ~

Good morning and welcome to a new bi-weekly challenge at Word Art Wednesday
 We have more great prizes this week SO be sure to stop by and check this challenge out.  AND make sure to post your creation for an opportunity to win! 

This week we have a wonderful passage from the New Testament.  I chose to use a grunge stamp to add layers of pink, rose and red before adding a beautiful die cut heart.

 I started with a white card stock panel measuring 5.5 x 4.25 inches.  I used a piece of SU Blushing Bride Pink CS for a mat and printed my scripture panel on white card stock.  I positioned it to the right of my card stock panel and used a die to cut it out as pictured.  I then layered on stamped "ink blotches" for interest.  I chose a bit of Stampin' Up Real Red card stock and this fun die from Simon Says Stamp for the corner.  #SimonSaysStamp
  

It is amazing how God works.  After I had put this card together and photographed it...  I realized some of the "spots" resembled blood...  There is not greater love than that my friends...

Blessings...

Supplies

Ink - Stampin' Up - Real Red, Rose Red, Blushing Bridge
Die - Our Daily Bread Designs Flourished Star Pattern Die
Stamp - Stampin' Up Gorgeous Grunge


Tuesday, February 2, 2016

Merry Monday, on a Tuesday!

Merry Monday!  And no, I haven't lost my mind.  I really do know it is Tuesday!  I decided to shake things up a bit this week.  On Monday, Our Daily Bread Designs shared their February release.  So if you would like to check out the fun projects and items I shared click HERE.

So instead of sharing on Monday, I have a fun card for you today AND if that isn't shaking things up enough...  I have a VALENTINE card!  


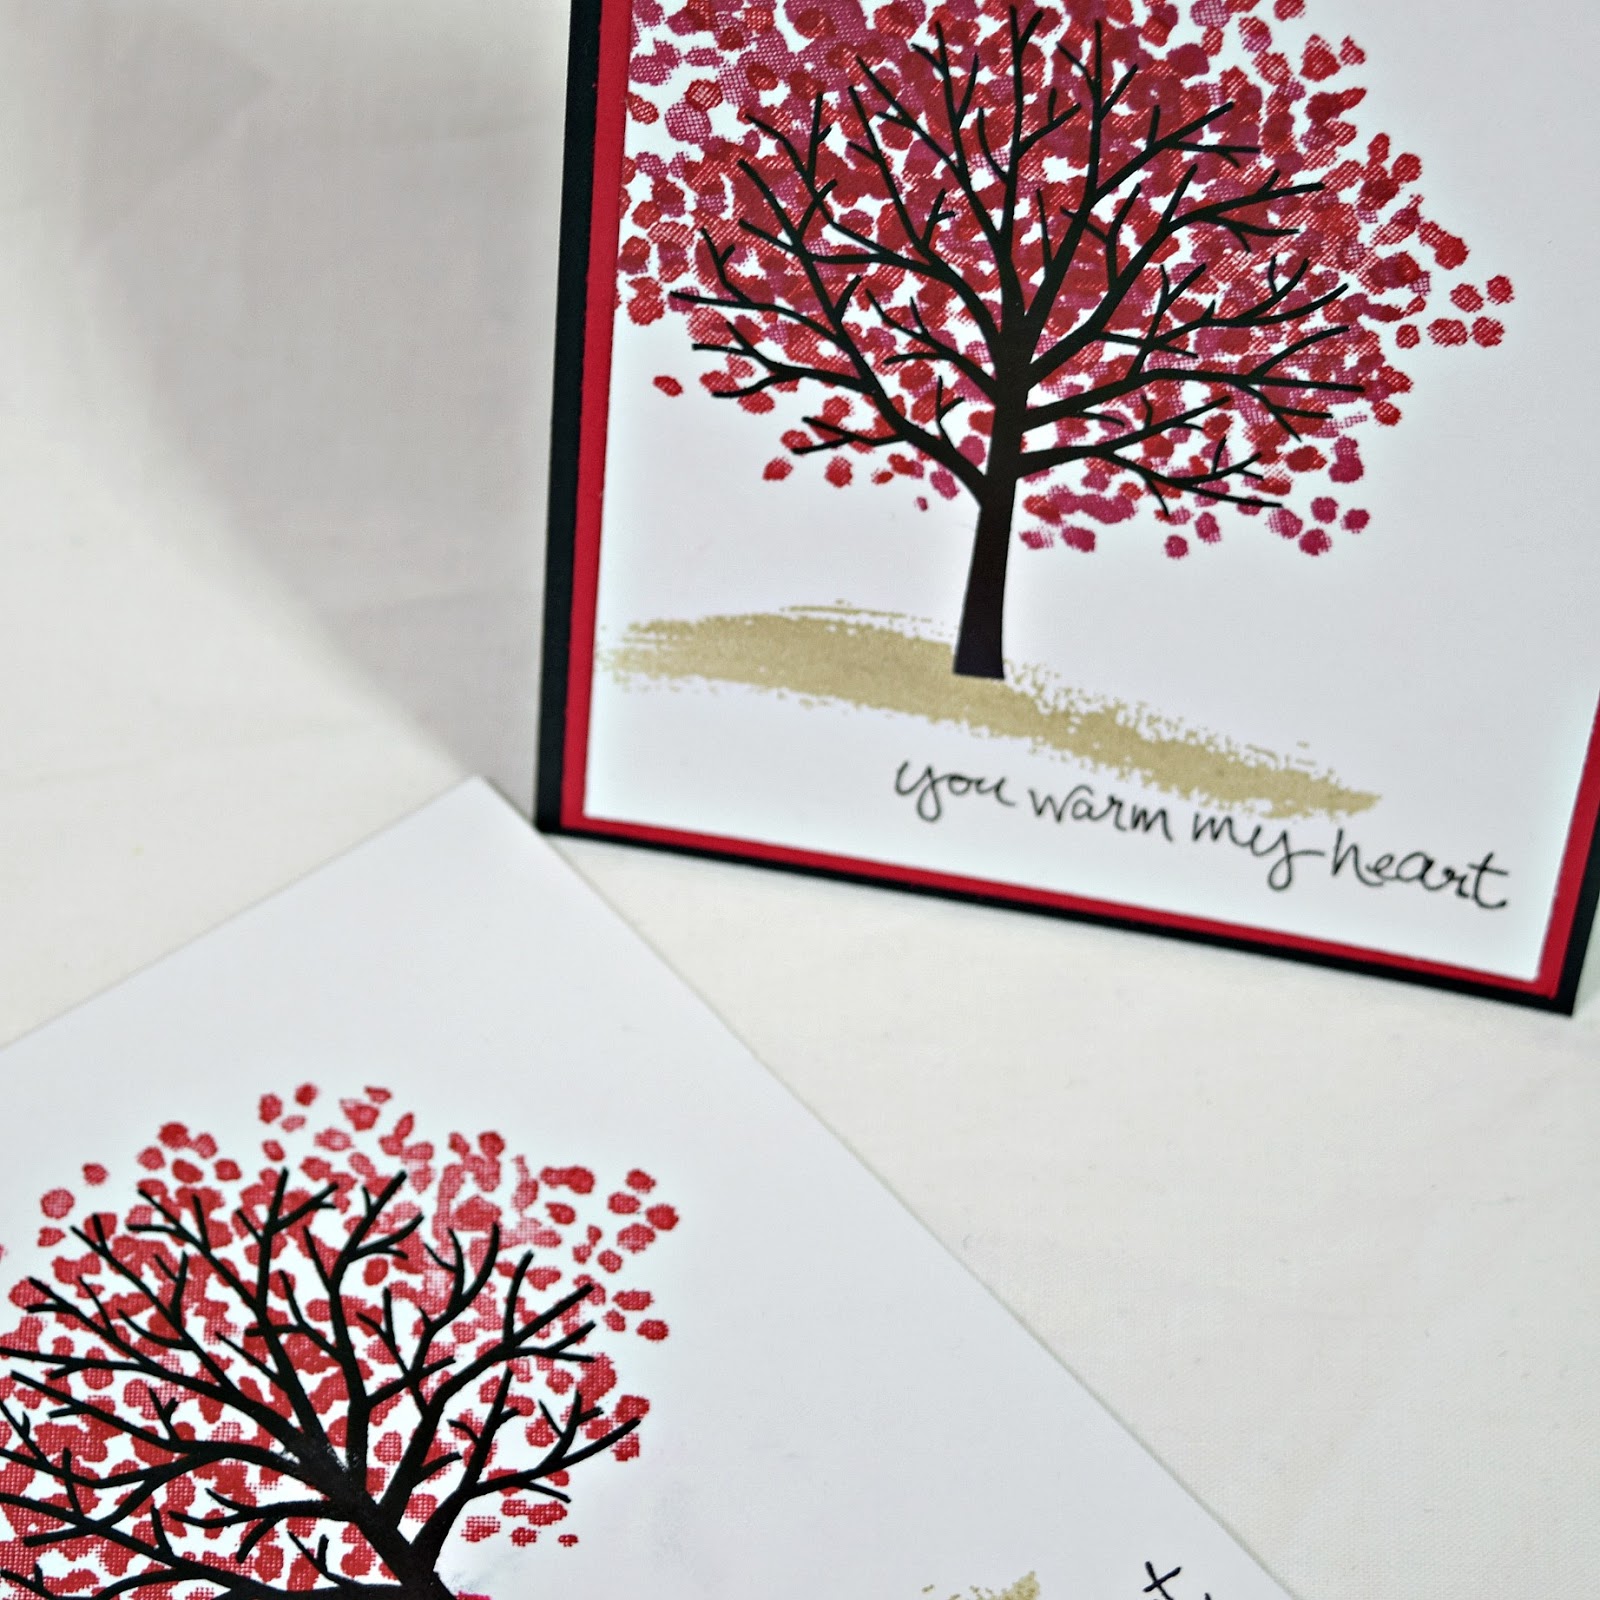
My fabulous Stampin' Up rep loaned me her Sheltering Tree stamp set.  I love this stamp and will definitely be adding this set to my collection.  I started with a black CS base and Real Red CS mat.  I used Sahara Sand, Basic Black, Rose Red and Real Red to stamp the image.  I opted to add two layers of leaves in Rose Red and Real Red.  I wanted a bit more depth.  In this photo you can see the panel at the bottom using Real Red only...  The best part?  You can do whatever you want!  ;-)


And here is the stamp set...
 

I think I could stamp the leaves with white ink on blue card stock and make a wonderful Christmas image...  maybe for another MERRY MONDAY!  Thanks for stopping by!

Blessings...

Monday, January 25, 2016

Merry Monday ~ The Perfect Mix of Warmth & Cheer ~

Baby, it's cold outside!  For those of us anywhere within a day's drive of the Atlantic Ocean...  OUCH!!!  I am so grateful we had the limited amount of snowfall we did.  Family in Baltimore didn't fare so well...  They had over 20 inches of the white stuff!  :-(
But I must say, a good snow brings out the creative beast in me!  Or was it the fact I hadn't had access to peanut butter chocolate ice cream for a few days???  :-)  
Either way, my creative juices were flowing and with the ever present fear of the power going off...  a few creative juices flowing couldn't hurt the body temp, right?  

Here's a fun one using a few Stampin' Up products from this past Christmas...


So I started with a simple black card stock base and cut a slightly smaller white CS panel.  I stamped my cardinal (three step process) and sentiment BEFORE using the snow themed embossing folder.  
I chose the Joyful Season stamp set and stamped my outline with Basic Black ink, added the body with Real Red and a dab of Pumpkin Pie for the beak.  After placing and stamping the sentiment, I ran the panel through my Big Shot with the Softly Falling Textured Impressions Embossing Folder.  I intentionally stamped the cardinal a bit "off."  I really like the abstract feel to the image, particularly with the embossed snow!

Thanks for stopping by!

Blessings...

Inks - Stampin' Up - Basic Black, Real Red, Pumpkin Pie
Stamps - Stampin' Up - Joyful Season
Embossing Folder - Softly Falling Textured Impressions Embossing Folder

Monday, January 18, 2016

Merry Monday ~ Silent Night ~


Good morning and welcome to another Merry Monday!  I spent some time on a craft blog recently and found a very surprising conversation.  One participant was ripping her own creation apart because it didn't meet the standards of the contest she posted it too. 
 
This got me thinking about how I am often SUPER critical of my own work...  worrying if it satisfies other crafters...  and then I decided to look up the definition of creative... 
 
 Here it is courtesy of the Oxford Dictionaries online site...
 
 NOUN


 So the next time you are tempted to pick apart your own work...  remember your imagination is a good thing! 
 
Blessings...
 
Card Stock - Stampin' Up - Night of Navy, Georgia Pacific White
Ink - Stampin' Up Night of Navy
Stamps - SU - Jingle All the Way
Dies - SU - Sleigh Ride Edgelits Die

Sunday, January 10, 2016

Merry Monday

Good evening and welcome to my very first Merry Monday of the new year!  I couldn't wait...  and since I have already missed a few...  I decided to pop in a bit early...  My plan was to have a post featuring a new Christmas card each Monday...  hence the title Merry Monday.  But sometimes life gets in the way.  In this case a nasty respiratory bug took me down for several weeks.  So now that I have regained the use of BOTH lungs...  I can share a new card...  

This card features some fun Stampin' Up products I added to my stash this fall and winter.  I started with a Real Red CS base (5.5 x 4.25 inches) and cut a slightly smaller white CS mat.  I embossed this panel with my SU Softly Falling Textured Impressions Embossing Folder.  I stamped the wreath (from SU's Wondrous Wreath stamp set) on white CS using Wild Wasabi Ink and Real Red for the berries.  Then I pulled out SU's Wonderful Wreath Framelits Dies to cut it out.  This same die set along with a bit of Real Red CS also created the beautiful word "Noel."  I added the wreath with dimensional foam and the word Noel with liquid glue.  Super easy and so cute!  So some of these items were in the Christmas catalog so I'm not sure if they are still available.

  *******UPDATE******  the items listed on today's card are still available according to my SU consultant!  :-)

  I think the design is fairly simple to copy with any stamp and/or die set!

Thanks so much for stopping by!  Happy stamping and blessings to you and yours!

Wednesday, October 7, 2015

WAW204 ~ Renewed Day by Day ~

It's the very first Wednesday in October!  And you know what Wednesday means...  it's time for another fabulous, fun and inspirational challenge at Word Art Wednesday.
  
Be sure to check out the Word Art Wednesday site for all of the details including this week's digital scripture, how to link your creation AND info on some fabulous prizes! 
We appreciate our sponsors so very much!  Please take a few moments to thank those who generously provided our prizes this week!

Today our digital scripture features a passage from 2 Corinthians...


I printed my scripture on white card stock and added a red mat.  I used the same red card stock to create my card base (5.5 x 4.25 inches).  I cut a slightly smaller white card stock panel and used a grunge stamp with taupe ink to add depth to the card.  If you look closely, you will see I embossed the same panel with a falling snow design.  I stamped my two step poinsettia on white card stock before fussy cutting and adding with dimensional foam.  

Don't forget to stop by Word Art Wednesday to see how you can play along and pick up this fabulous digi scripture image!  Thanks for stopping by!

Supplies 

Card Stock - Stampin' Up Real Red, Georgia Pacific White
Ink - Memento Tuxedo Black, Stampin' Up Real Red & Wild Wasabi
Stamps - Stampin' Up - Reason for the Season, Gorgeous Grunge
Embossing Folder - Stampin' Up Softly Falling Textured Impressions Embossing Folder

Monday, July 20, 2015

SU ~ Thinking of You ~

Good morning!  Today's card features a stamp I purchased from Stampin' Up called Wetlands.  And if your neck of the woods is anything like mine...  it is WET!!!  We have had torrential rain in our area along with surrounding counties.  Please join me in praying for the needs of those struggling with loss this week due to extreme weather. 
 
This card will go to a friend...

 
I started with a black card stock base measuring 5.5 x 4.25 inches.  I scored the base diagonally at 1 inch intervals.  I stamped my image (multiple grass images along with the Canadian goose) on Copic compatible paper and lightly colored everything.  I sponged Bamboo ink on for grass and Summer Sky (along a torn piece of paper) to create my sky. 
 
I double matted the image with black and white card stock and stamped the sentiment on a scrap piece of white card stock.  I used a die from Our Daily Bread Designs (Pennant Dies) and glued it directly to the image panel.
 
Thanks so much for stopping by! 
 
***Hugs***

Friday, June 26, 2015

SU ~ Star Spangled Chevrons ~

Good morning and welcome!  Today, I have a different project celebrating the upcoming 4th of July holiday.  If you are a trend watcher, you know that chevrons have been BIG.  You see them everywhere from home decor to ladies' fashion.  And I everyone from the cutest little girls with brightly colored hair bows to middle aged voluptuous ladies And yes, I count myself among the latter!  :-)  Anytime I find a trend that catches my eye, I try to incorporate it into my paper projects.  A friend of mine has an embroidery business and she shared a fun project she was working on via Social media.  It involved chevrons (created with red Ric Rac) and her interpretation of Ol' Glory.  I was amazed/bedazzled/inspired and nearly passed out...  Did I mention I was totally bedazzled????  SO what does any crafter do when inspiration strikes??  You run to your craft room and go with it!!!                                                          

I started out my stamping my blue field twice, first on the actual focal panel and then again on a piece of scrap paper.  I cut the second one out to use as a mask.  I placed the mask over my original blue field and used the chevron stamp to create my stripes, stamping over the masked area for continuity.  And yes, I used a stamp positioner for this part, because spaced these just right is very tricky...  and I am so not talented...

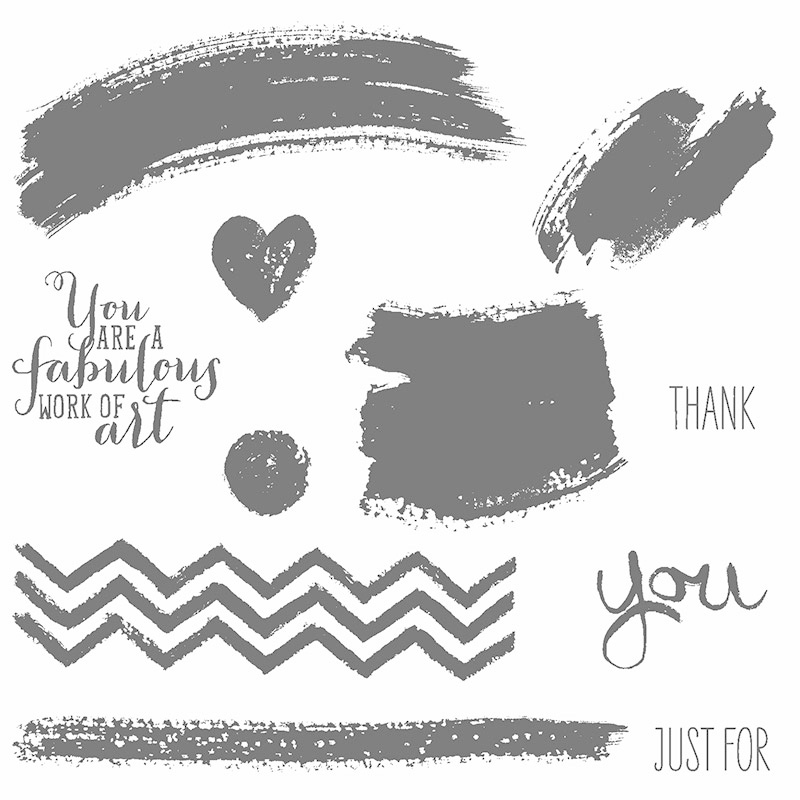
and the set that started it all... Work of Art

I love this set!  When I first looked at it in the catalog, I was struggling for ideas...  but now I am so hooked and can't wait to do more...  rainbows... masculine cards...  the possibilities are endless!

additional supplies 

Stampin' Up - Night of Navy  Card stock and Ink
Real Red - Card Stock and Ink 
White Card stock - Georgia Pacific

Thanks so much for stopping by!  I hope you have a wonderful day!


Sunday, June 14, 2015

~ Happy Flag Day ~

June 14th is Flag Day in the United States.  This day marks the adoption of the flag of the United States by resolution of the Second Continental Congress in 1777.  President Woodrow Wilson issued a proclamation in 1916 that officially declared June 14th Flag Day.  So in honor of this special day and my love of Old Glory, I decided to share a card I created using some items in my stash.
God Bless America!

Today's supplies

Stampin' Up - Work of Art set

Inks - Stampin' Up Night of Navy, Real Red
Papers - Georgia Pacific, Stampin' Up Real Read & Night of Navy
Punch - Star by Creative Memories

Have a wonderful day!

Friday, September 16, 2011

Grateful to be back...

Happy Friday! Today will be a catch up day at the Ulrich household. I am off work today and getting ready for John's youngest, Michael to arrive later today for the weekend. Can't wait to catch up with what has been happening at school!

As you may have noticed, I have been painfully quiet the last few days. And this fact is due to the issue I shared last post (a broken Cuttlebug...) I ordered from a major online company (and no, I will not name them) and my item arrived 8 business days after I placed the order. By this time I was quite frantic (exactly why my posts have been few and far between...) So Wednesday night I opened the box and proceeded to assemble my new Big Shot. But why wouldn't it assemble??? I watched You tube video after video and it seemed so simple... But yet, I couldn't do it... So dear hubs came home to a panicked look and quickly took control. After 30 minutes of tweaking and repeated analysis of the instruction book he finally concluded that the gears were not meeting and thus my Big Shot was a Big Flop.... AAAARRRRRRGGGGGGG!!!!!

So I contacted major internet sales company. They would be happy to overnight me a new Big Shot but ONLY after the broken one arrived in their office!!! Considering it took 8 days to get to me... (And did I mention it could take up to 4 weeks to get a refund?) Funny... they debited my checking the DAY I ORDERED....

So dear hubs called every store in a 70 mile radius from our home to find a Big Shot. Bad news... they no longer carried them... So he did a great deal of research (having a RETIRED hubs is grand....) and promptly found me a Big Kick for 50% off at Michaels!!!! He told them to hold it for me and drove 64 miles (one way) to pick it up!! GOD BLESS THIS MAN!!!!

I shared my horror experience with the Michael's CSR (I think his name was Lyle). He promptly said "let's open this one and make sure it meets your expectations!" This sweet young man took it out of the box, assembled it right there and made this customer VERY happy!!!! Thank you to the folks at Michael's on Hamburg in Lexington, Kentucky! You guys rock!!!! In this day and time it is so refreshing to find those in retail who go the extra mile! And big hugs to the best hubs in the world! Blessings...

Now on to today's card....


Today's card features several Stampin' Up products. Talk about going the extra mile... If you don't have a Stampin' Up contact might I suggest Barb Gornick. You will find her site here. I met Barb several years ago when I was a regular on the Cricut MB. She has some awesome ribbon and paper shares! I have been blessed with so many wonderful new friends through this hobby! Barb is a jewel!

Card Details

Paper - Bazzill, Neenah, Stampin' Up; Stamps - Stampin' Up - Always Thankful; Ink - Memento Tuxedo Black, Copics; Embossing Folder - Stampin' Up; Die - Cheery Lynn Designs - Italian Flourish; Ribbon, Scor-Pal

Tuesday, September 7, 2010

Mojo Monday


Is it Friday yet? Oh, my goodness... we paid at work today for that long weekend.... I'm not sure vacations are worth it... LOL... I created this card for the contest going on over at Mojo Monday's site. Well as you can see it is TUESDAY and I am just getting around to posting it. After a busy day with family yesterday and a late night at Copic class I was too tired to post. I really hate having to work to support my habit... :-P

Thanks as always for your positive encouragement. I treasure each and every comment. Thanks so much and blessings to you!

Lori


Card Recipe

Finished Size

5 X 7 inches

Card stock - White - Georgia Pacific, Kraft - Gina K., Others - Bazzill
Card stock - Image - Bazzill - Simply Smooth
Designer Paper - Making Memories - Max Gingham, Bo Bunny Shabby Princess - Bluebell Blossom
Stamp - Image and Sentiment - Stampin' Up - Peace Within
Ink - Image - Memento - Tuxedo Black
Ink - Sentiment and Grass - Memento - Bamboo Leaves
Ink - Sky - Memento Summer Sky
Die Cuts - Spellbinders - Standard Circles Large, Petite Scalloped Circles Large
Punch - Fiskars (tag) card stock underneath trimmed to shadow
Ribbon - Unknown
Markers - Copic

Sorry, this is one I do not have the color scheme on... :-(

Tuesday, August 10, 2010

Card Making Machine


Vacation rocks! I have gotten so much done around the house over the last few days. I actually feel like I have a handle on things for the first time in 6 months. That is a great feeling!

Even more amazing is the fact I have 7 cards done, photographed and ready to post over the coming days! This is a new record for me. :-) And I owe it all to nervous energy. Last night I was up until well after midnight making cards. Why? My beloved Morgan, the St. Bernard was having puppies! Some people pace or smoke cigars, I make cards! :-) Poor hubby was up all night and as I type is trying to catch a few well deserved winks. Unfortunately there are so many complications that can arise so he has to stay with them pretty much the entire first ten hours. My big girl had 9 puppies! She is such a good little mommy. She checks on each and every one. What a trooper!

So during the coming days you are going to see a sort of Morgan mini-series... creations I created as she brought puppies into the world. There is an eclectic mix of stamps, papers and the like so it should be fun for you to look at. Many of the images were colored months ago. I often color things several months ahead and "forget" about them. I may be unable to give you specific Copic numbers as I was not as faithful about tracking that months back. Well I am off to snuggle with baby fluffs and maybe make some more cards! Have a wonderful day!

I'll post puppy pics when the excitement settles down... :-)


Card Recipe 5 X 7 Inches

Cardstock - Bazzill
Cardstock - Image - Gina K. Pure Luxury
Pattern Paper - Basic Grey - Oliver - Evan (double sided)
Stamps - Image & Sentiment - Stampin' Up - Pedaling Past
Ink - Memento - Tuxedo Black
Embossing - Provocraft - Cuddlebug Folder - Polka Dots
Ribbon - Offray - 5/8 Inch Satin - Leaf
Adhesive - Pop Dots, Glue Glider Pro

Surprise!!! It's Best Bunny!

There is something about Granny Apple Green that just brings a smile to my face!  When the first signs of Spring appear you are sure to see...