Showing posts with label Christmas. Show all posts

Wednesday, December 7, 2016

Word Art Wednesday 260 & 261 ~ For God So Loved the World ~

Good morning and welcome to another fun challenge at Word Art Wednesday.  Today we have one of the most beloved passages in Scripture to share.  You will see this everywhere from professional athlete's shoes to signs at sporting events.  It is this particular passage that so succinctly describes God's unmerited mercy and grace.  The most precious gift ever given arrived in a lowly stable over 2000 years ago....


This gift arrived without wrapping paper or bows, but most certainly was the most beautiful gift ever given.  I am so thankful that He is mine...

Card Stock - Stampin' Up, Georgia Pacific
Designer Paper - Echo Park - I Love Christmas by Lori Whitlock
Die - Layered Lacey Ovals Die by Our Daily Bread Designs
Misc. - Baker's Twine

Blessings!!

Friday, October 31, 2014

~ Have a Holly Jolly Christmas ~

Happy Friday morning!  Today's project features an Our Daily Bread Designs' stamp from last year AND a new coordinating die released this month!  I love coordinating dies!  They make my finished projects so much easier.  I love this image and last year I fussy cut the image.  That took a bit of time and patience!  Now I can just line up the die and cut away!  LOVE THAT!  

Today's card features the Holly Wreath stamp and coordinating Holly Wreath Die...


F497 - HOLLY WREATH


and the sentiment placed and die cut with...

CSBD60 - PENNANT DIES

And the other products you see...

Ink - Memento Tuxedo Black (Image); Memento Espresso Truffle (Sentiment); Copics
Paper - Neenah Solar Crest (Image); Georgia Pacific - white; Bazzill; The Paper Studio Woodland Winterland (DP)

Thanks for stopping by!  Don't forget to stop back by tomorrow as we explore the new release from Our Daily Bread Designs.  I can't wait to show you all the new stamps and dies, Kelley and company have for you!  

Blessings....

Monday, October 27, 2014

~ It Came Upon a Midnight Clear ~

Good morning!  Today's card design has been rattling around in my brain for quite a while now.  I wanted to do something for Christmas with a feminine feel.  And when Our Daily Bread Designs released their Doily Die a month ago...  I knew I had the perfect base for my design!  I added a few die cut poinsettias created with the October release Peaceful Poinsettias Die and came up with this...


And the layers you see...

5.5 x 4.25 dark red card stock base
ecru mat
dark red CS mat
BBP Believe coordinating papers base and banners
Our Daily Bread Designs Doily Die - dark red CS base, ecru doily
Our Daily Bread Designs Fancy Foliage Die - dark green CS
Our Daily Bread Designs Peaceful Poinsettias Die - dark red CS, dark green CS (leaves)
Flower Soft Meadow (centers of poinsettias)
Our Daily Bread Designs God's Timing - sentiment stamped with Memento Rhubarb Stalk

Here are the products you see -


CSBD33 - FANCY FOLIAGE DIES

CSBD62 - DOILY DIES

I hope you enjoyed today's project!  If you did, please be sure to leave me a quick note!  I treasure your comments and encouragement!  Thanks so very much.

Blessings...

Lori 

Wednesday, December 25, 2013

WAW112 ~ Merry Christmas! ~

Welcome!  It's time for another 
inspirational challenge at Word Art Wednesday.  

Check out the WAW site for all the details including this week's digital scripture image, how to link your creation AND info on our fabulous prizes! 
 
A special thank you to both V's Sweet Ideas and Diane Noble at Daydream Designs by Diane.
 
As you gather with your family today and exchange gifts don't forget to thank the father for sending the most precious gift over 2000 years ago, Jesus Christ. 

For without his birth and subsequent crucifixion, we would be lost in our sin, separated from our Lord.  It is through his death that we stand justified before our Lord instead of condemned in our sin. 

Thank you Lord Jesus for coming all those years ago!


Merry Christmas to you and yours!

Supplies

Scripture - Word Art Wednesday
Papers - Georgia Pacific, The Paper Studio, Bazzill, BBP Believe
Misc. - Recollections Pearls, Recollections Snowflakes


Monday, December 16, 2013

Exploring Cricut ~ It's Beginning to Look Like Christmas ~


Welcome to another fun bi-weekly challenge at
 
The challenge this week....
 
"It's Beginning to Look Like Christmas" 
 
create a card, layout, or paper craft for Christmas...
 
and my submission using Joys of the Season...
 
 
Cuts
 
5 inches for plate and peace sentiment
3.167 inches for holly
 
Products
 
Stamps - Our Daily Bread Designs - Ornate Background
Ink - Close To My Heart Chocolate
Papers - Bazzill, The Paper Studio
Misc. - Pearls by Recollections
 
Thanks for stopping by!!


Friday, December 13, 2013

~ Glad Tidings ~

Good morning!  So glad to see ya!  Today, I have a card featuring a new set (new to me) from Close to My Heart.  My dear friend Emily, recently featured this set in our monthly card class and I couldn't wait to crank out some more cards using it! 
 
I must confess this image scared me a bit!  There are certain images that intimidate me!  When you are coloring an image of Mary and baby Jesus...  Somehow I just worry I will never be able to do it justice!  So here it is!  I pulled the fold idea from a recent edition of Cardmaker magazine.

 
There is something about this image that speaks to my heart.  I was never blessed with children but I can only imagine the wonder Mary must have had as she cradled her firstborn.  The questions she may have pondered as she thought about the amazing circumstances of his birth...  The love that only a mother can understand...  This image just cuts directly to my heart on so many levels.  Maybe that is why I worried over the coloring so much...
 
I also added a colored star image from the same set.  I hand cut it after stamping and coloring.  A bit of Stickles adds some bling!  I stamped the sentiment directly on the bottom panel as I couldn't find a die cut that worked!  I wanted the focus to be entirely on the image panel!  Thanks so much for stopping by!  Until next time...
 
Blessings...
 
Lori
 
Supplies
 
Stamps - Close to My Heart - Mary and Babe
Ink - Memento Tuxedo Black, Copics, Versafine Onyx Black, Memento Summer Sky
Dies - Spellbinders Ovals Large, Classic Scalloped Ovals Large
Misc. - Stickles - Star Dust

Wednesday, December 11, 2013

WAW110 ~ Glory to God ~ Luke 2:14

Welcome!  It's time for another 
inspirational challenge at Word Art Wednesday.  

Check out the WAW site for all the details including this week's digital scripture image, how to link your creation AND info on our fabulous prizes! 
 

A special thank you to both Nice Crane Designs and
 Verve Designs  
 for providing our prizes this week!

This week we are featuring a scripture from the book of Luke and the most wonderful Christmas story ever told...


It seems our tired world needs this message now even more than ever.  Peace, good will, LOVE...  The LOVE of Christ...  Blessings to you and yours this Christmas season!

Supplies

Paper - Bazzill, Georgia Pacific, Fancypantsdesigns - Home For Christmas, DCWV - The Christmas Basics Stack
Dies - Spellbinders Layered Poinsettia
Punches - Martha Stewart Crafts
Misc. - ArtMinds Bells, Jillibean Soup Baker's Twine, Flower Soft - Meadow

Challenges

Twist of Faith Card Challenge - #67 Traditional Christmas
Ribbon Carousel - RCC88 - Anything Goes
 ABC Christmas Challenge - Make Your Own Embellishment - Poinsettia
Creative Card Crew - Challenge #51 Holly or Poinsettia
 

Tuesday, December 10, 2013

~ Manly Plaid + Feminine Doily = One Cool Card ~

I am having so much fun working with this month's Our Daily Bread Designs' release!  (Ok, I have fun EVERY month working with the new stamps!)  My husband swears the smell of new stamps is intoxicating for me!  ;-) 
 
Here's a decidedly frilly project using some new papers in my stash and a whole lotta dies, frills and glue!  It has so many components it reminds me of my Mom's Jam Cake recipe she pulls out every Christmas!  Those cakes are a whole lotta work but boy do they taste FABULOUS! 
 
So here it is, completely calorie free and in honor of my baking analogy...  there's a real honest to goodness doily tucked in there!

 
and the ODBD products I used...


and last month's
 
 
So what do you think?  I love combining blue and white!  Thanks for stopping by!  Until next time...
 
Blessings...
 
Layers
 
5.25 x 5.25 dark navy Bazzill card stock base
white Georgia Pacific mat layer
DCWV The Winter Basics Stacks
Ranger Distress Ink Chipped Sspphire & Tumbled Glass (snowflake DP stripe)
Sunny Side Up Baking Essentials White Doily
Spellbinders Labels Twenty Two (dark navy Bazzill)
White Georgia Pacific (ODBD Ornate Borders and Flowers image, ODBD No Words Sentiment) with Close to My Heart Ink - Outdoor Denim
Recollections Pearls
 

Floral Spray
 
Spellbinders Layered Poinsettia Die - White Georgia Pacific & Bazzill (leaves)
Flower Soft Meadow (poinsettia center)
ODBD Circle Ornaments Die (Holly Leaves) Dark Green Bazzill
Punches - MS Crafts - White GP
Pearl Flourishes - Recollections
Silver Spray - The Paper Studio

Challenges

A Gem of a Challenge #110 Anything Goes
Through the Craft Room Door Anything Goes
DL Art - December Anything Goes


Monday, December 9, 2013

A Peek at My Christmas Decor ~ It Takes a Village ~

Good morning!  So glad you stopped by!  Hope you have a warm cuppa Joe in hand on this wintry December morning!  I have given up caffeine (and boy am I grumpy...) so I will grab a bottle of water instead! 
 
Today, I am giving you a peek at some of the Christmas decorations in my home.  The last few years have been challenging with physical ailments and the like which would not allow me to decorate the way I love to!  Christmas is my favorite time of year and I am one of those crazy ladies who would have a Christmas tree in EVERY room!  ;-) 
 
I love the look of Christmas villages and have a few pieces I picked up over the years.  Unfortunately, this is one of the décor projects that always fell victim to my lack of energy.  This year, I started early and found a wonderful project to create a starry background for my little town!  I can't take credit for this project, so I will share the link at the end of my post!  It was SO easy and CHEAP!  Gotta love that!  I found everything at my local box store!  And it just adds so much to my village!  Now if I can just find the ceramic bank that was a gift...  :-( 
 
I cleaned off the hutch and layered some Buffalo Snow.  And underneath you will find nearly every small flat plastic container I own!  I wanted to elevate the Silo and Tree Farm (in the middle) so they are on top of my plastic containers.  No leftovers allowed for us for a while!  I don't have anywhere to store them!  :-) 
 
So here's the grand tour of Ulrich land... 
 

If you look closely you will find a tiny nativity in front of the church.  I found a Joseph, Mary and Baby Jesus set at a Michaels' store (50 percent off) and added it to the outside of my church.  


And here you can see how I elevated the silo.  The background is made out of LED lights, black foam board and black tulle.  I have listed the link below so you can create one too!  


This farm is the very first piece I owned!  My parents bought this for me when I married and left home nearly 20 years ago!  They wanted me to remember my roots!  The cows are Holsteins.  And since I grew up on a dairy farm that makes it even more special!  I only had 2 Christmas' with my Dad after this gift...  Naturally, I treasure it!  
 
I hope to find a few more buildings to add to my collection after Christmas this year.  In the meantime, I plan on picking up an oval mirror on my next trip into Hobby Lobby and add it in front of the horse.  (I think the chickens need a watering hole...)  I plan on placing a few cotton balls around the edge to create a snowy pond!  So what do you think? 
 
Thanks for stopping in!  I hope you enjoyed a peek at my décor and I hope it might inspire you to pull out some of those forgotten treasures! 
 
Blessings...
 
And here's the link on how to create the starry background... 
 HERE

Monday, December 2, 2013

Exploring Cricut ~ Christmas Cards Challenge ~

Welcome to another fun bi-weekly challenge at
 
The challenge this week....
 
 Create a Christmas card using any cartridge from your stash in ANY color! 
 
We want to inspire you to create some cards for your Christmas stash!

This week I chose to work with a Cricut Lite cartridge, Inspired Heart, to create a lovely faith based card!
 
 
I cut the image out at 3.75 inches (base layer in blue and image in white).  The card base is a simple 4.25 by 5.5 inch card with a mat layer of blue and another layer of snowflake embossed white.  I added a bit of blue/white ribbon from my stash!  Super simple and easy to mass produce this Christmas!  Thanks for stopping by!  Have a wonderful day!
 
Lori
 
Supplies
 
Cricut Cartridge - Inspired Heart - 3.75 inch cuts (blue & white)
Paper - Georgia Pacific, Bazzill
Embossing Folder - Darice
Ribbon from my stash

Wednesday, November 27, 2013

WAW108 ~ Fear of the Lord ~

Welcome!  It's time for another 
inspirational challenge at Word Art Wednesday.  

Check out the WAW site for all the details including this week's digital scripture image, how to link your creation AND info on our fabulous prizes! 
 
A special thank you to both My Craft Spot and Cynthia Milan with Close To My Heart
 for providing our prizes this week!

This week we are featuring a scripture from Proverbs...

 
based on the MOJO 321 sketch shown below...


and inspired by The Shabby Tea Room #194 "Christmas is Coming" Challenge

Inspiration Photo below
and use Brown, White & Red


Thanks for stopping by!  Praying you have a wonderful Thanksgiving filled with love, family and friends!  Be safe!  {{hugs}}

Lori

Card Recipe

Paper - The Paper Studio, Georgia Pacific, K & Company - Christmas Cheer, Fancypantsdesigns - Home For Christmas
Dies - Spellbinders Standard Circles Small & Stately Circles
Misc. - Recollections Ribbon & Clock Embellishment
 

Sunday, November 17, 2013

~ A Little Bit of Green and Remaining Focused ~

Good morning!  Thanks as always for stopping by!  I have a wonderful card to share using Our Daily Bread Designs' November release, Poinsettia Wreath.  I love this time of year and I have already started a projects around the house.  I love Christmas and all of the decorating that goes with it!  Last year was a difficult year as I found myself struggling to even put up one tree!  This year I feel SO MUCH better and PRAISE God for his many mercies!  I just know this will be the best one yet! 
 
I wanted to share a funny story before diving into today's card.  A few weeks back, hubs and I were doing some long neglected outside chores.  I glanced up to see one of our ewes (female sheep) bleating frantically and running alongside the fence.  Thinking there might be a predator about, I rushed over to the field to see why she was so distressed.  I realized that there were ZERO sheep anywhere to be found!  After scanning the field, I realized this poor little girl had gone to sleep and the rest of the flock woke up and promptly went out to graze.  She couldn't see them and they couldn't hear her cries.  If you know anything about sheep at all, you know they have an incredible herding instinct.  They stay together for safety and security and get very nervous by themselves.  This little dear had taken her eyes off the prize so to speak and as a result was left behind.  Do you see where I'm going with this friends? 
 
If we fail to keep our eyes on the prize (Jesus), we get easily distracted.  I admit, I am guilty of this.  And it is so easy to look up, panic, and then frantically try to find him in our times of distress.  Fact is, he was there all the time!  He NEVER leaves us!  We just took our eyes off of him!  Thanks for reading...
 
Today's card...

 
 featuring Poinsettia Wreath


I used Kraft for my card base and added a layer of red card stock, scored at 1 inch intervals.  I wanted to create a background that resembled clapboard.  I then ran a distress ink pad lightly over the red piece to age it and define the score marks.  I used the Cathedral Window and Border Dies set to create my window (including an illuminated yellow interior) and frame.  I added the frame with dimensional foam to give it a realistic feel.  I colored the wreath with Copics and cut an additional poinsettia image and ribbon to add for dimension.  After completing those cuts and assembling my wreath, I added it to the "window."  So cute! 
 
Thanks so much for stopping by!  Until next time...
 
Blessings...
 
 
Additional Products
 
Paper - Neenah Solar Crest, The Paper Studio, Bazzill
Ink - Memento Tuxedo Black, Copics, Ranger Distress Ink - Tea Dye
Misc. - ScorPal

Friday, November 15, 2013

North Coast Creations' November Release

Welcome to the North Coast Creations November New Releases!  We will be choosing 2 winners who will receive a $10 gift certificate to the store for stamps just for commenting on our Design Team cards! You have until November 17, 2013 at 10:00PM EST to make a comment on each of our designers blog posts.  Our 2 random winners will be announced on the North Coast Creations Blog on November 18, 2013.

Here's the new stamp set featuring Santa Paws, lovingly colored to resemble a Golden Retriever...


and Santa Claws looking like the mischievous kitten...


Some of the products I used...


Thanks for stopping by!  If you get lost along the way be sure to visit the NCC Blog.
 
And here are the links of my fellow "Coasters" so you can play along...  {{hugs}}
 
DT Links:
 
Lisa * Dawn * Julie * Amber * Lori (You are here) * Cindy
 

Supplies
Woof Top

Papers - Bazzill, Our Daily Bread Designs Christmas Paper Collection 2013
Ink - Memento Tuxedo Black, Copics
Die - Spellbinders Fancy Ovals
Misc. - Pearls by Recollections, Ribbon

Supplies
Meowy Christmas

Papers - Bazzill, The Paper Studio
Ink - Versamark, Memento Tuxedo Blck, Copics
Dies - Our Daily Bread Designs Ornament Circles Die, Spellbinders Standard Circles Large
Misc. - Sequins
 
Challenges


Friday, October 18, 2013

A Look Back at Our Daily Bread Designs October Release

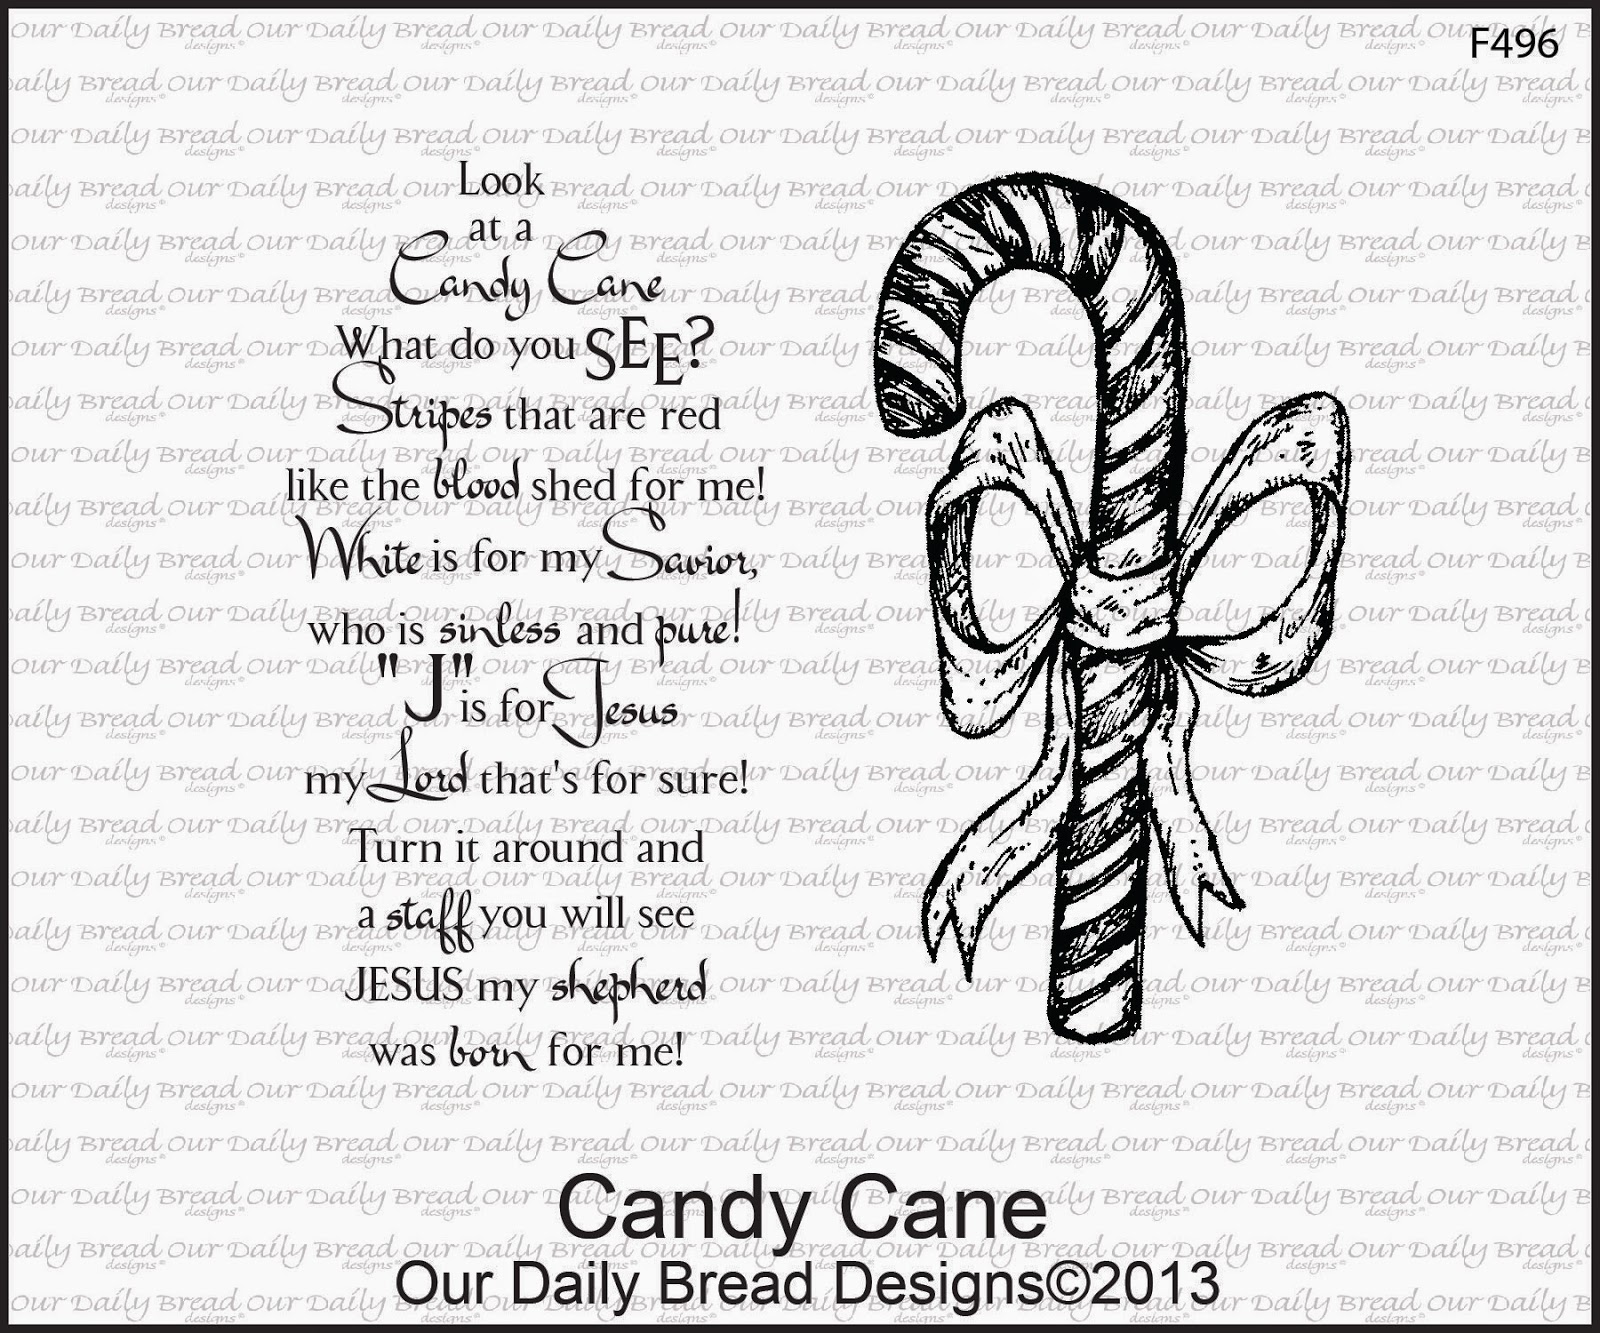
Today we are taking a look back at Our Daily Bread Designs October Release.  Can you believe that the month is winding down?  With Thanksgiving around the corner, I begin to kick my Christmas mojo into high gear.  Here is the card I created using Candy Cane.

 
and a close-up... 
 
(after coloring the image with Copics and adding dimensional glaze, I added a bit of glitter...)


and an image of the stamp set...


There are several layers to this card.  I started out with a 5.5 x 4.25 inch red card stock base and added a white matted layer and then olive green.  The three colors mat/highlight a Christmas paisley print paper I choice for the final base layer.  I inked the edges of the paisley design with a tea dye distress ink.  
I then cut a red/white snowflake print and embossed it with a geometric EF.  I cut the panel into 4  1.5 x 2.75 inch rectangles.  They were popped up with dimensional foam.  I stamped the sentiment (black) on white card stock before cutting/embossing with a Spellbinder die. 
 
The candy cane (stamped on Copic compatible paper and colored) was covered with dimensional glaze before adding a light dusting of glitter.  Once my image dried, I fussy cut it and added it with dimensional foam to the bottom.  I think I need to try this with another one!  Thanks for looking!  

 For more inspiration using the October Release be sure to visit the ODBD Blog.  And don't forget to check out what my DT sisters have come up with!  {{hugs}}

Chris * Grace * Julie * Lori (you are here)*
 
* Sandee * Dawn * Sabrina *Cathy *
 
* ODBD Blog *

Products
 
Stamps - Our Daily Bread Designs - Candy Cane
Ink - Copics - R27, R27, E30, Memento Tuxedo Black; Ranger Distress Ink - Tea Dye
Papers - Bazzill, The Paper Studio, Neenah Solar Crest, K & Company Christmas Cheer
Dies - Spellbinders Labels Eighteen
Embossing Folder - Mandarin Screen by Provocraft
Glossy Accents & Sulyn Industries Glitter

Friday, October 11, 2013

~ Golden Wreath ~

Happy Friday!  So excited that the weekend is here!  It's been a crazy busy week in the Ulrich household and I am looking forward to a few days of catching up around the house.  I am even excited to do laundry!  Yes...  someone needs to take my temperature!  lol
 
Today I have another simple Christmas card to share using Our Daily Bread Designs' Holly Wreath set.  I embossed the image with gold powder.


and here's the stamp set image...


I added some gold ribbon I had left over from another project and some jingle bells from my stash.  I can check another card off my list!  Thanks for stopping by!  Until next time...
 
Blessings...

Thursday, September 26, 2013

Christmas ~ The Real Reason

Good morning!  Thanks for stopping in!  I have a new card to share today featuring several products from Our Daily Bread Designs' September release.  In just a few short days, Kelley will have some new products to share!  ;-)  They are beautiful! 
 
In the meantime, I have a Christmas card to share using an ODBD die and stamp set released this month.


I wanted to use the new Decorative Corners die but do something a bit "unconventional."  So I opted to cut out the die image on the bottom of my card, back it with a dark CS and reapply the cut.  I love how it gives a bit of added dimension.  In order to have the cross, we had to have the Savior's birth...  the cross serves as a visual reminder of the tremendous sacrifice he made. 
 
The stamped image was colored with Copics, hand cut and added to the top with dimensional foam.  The sentiment from the Jingle Bells set is embossed on another die cut. 
 
Here's the products I used...


Thanks for stopping by!  Until next time...
 
Blessings...


Sunday, September 15, 2013

North Coast Creations September Release

Welcome to the North Coast Creations September New Releases!  The North Coast Creations crew will be choosing 2 winners who will receive a $10 gift certificate to the store for stamps just for commenting on the Design Team cards! You have until September 17, 2013 at 10:00PM EDT to make a comment on each of our designers blog posts.  Our 2 random winners will be announced here on the blog on September 18, 2013.
 
So let's dive in with a couple of project I have to share today using two of the new sets, Santa's Sleigh and Old Fashioned Santa.
 
First Santa's Sleigh...
 
 
I colored this darling image with Copics and added glitter glue to all of the "packages" for added bling.  A rich red bow and black jet beads accent the black and white matting I used. 
 
and then Old Fashioned Santa with more of a vintage feel...
 
I also colored this image with Copics and lightly dusted the edge with distress ink.  The sentiment was embossed with a steel gray embossing powder.  I added lace and seam binding along with buttons and decorative pins for interest.  I wanted it to feel like bits of sewing scraps and ephemera.
 
Both sets are just darling and a dream to color!  Plus they are packed with cute sentiments for all of your project needs.  Here they are...


Don't forget to visit the Coasters' blogs, as listed below, to comment on all of the DT's cards! Winners will be chosen at random from the comments on the design team blogs.
 
 You can see ALL the NCC stamps HERE!

Dawn ** Lisa ** Sabrina ** Sandee **

Lori  (You are HERE) ** Julie **
 
Thanks for sharing release day with me!  Until next time...
 
Blessings
 
Products
 
Stamps - North Coast Creations - Santa's Sleigh & Old Fashioned Santa


Surprise!!! It's Best Bunny!

There is something about Granny Apple Green that just brings a smile to my face!  When the first signs of Spring appear you are sure to see...