Showing posts with label Long Lasting Love. Show all posts

Sunday, June 25, 2017

~ Wishing You ~

I am a sucker for a wedding.  I am probably the sappiest (is that a word?) person you will ever meet.  Just a few hours prior to writing this post, I finished up watching another Hallmark June wedding movie...  I would get married every week.  To the same wonderful guy of course...  but I'm pretty sure he would kill me!  lol...  I love the preparation, the festivities, the decor...  And I am especially LOVING the rustic/country decor that has taken over this part of the country.  My Pinterest feed has been taken over lately by wedding cakes...  and not just the traditional white frosting with basket weave but creative masterpieces designed to look like anything other than a cake.  I keep seeing cakes designed to look like birch trees and so I had to try to create my own version using Our Daily Bread Designs' Long Lasting Love.

Layer by Layer

  1. White Card Stock - 4.25 x 11 inches; scored and folded at 5.5 inches
  2. Silver DP (4.25 x 5.5 inches) ODBD's new Wedding Wishes Paper Pad
  3. Pattern DP Wedding Wishes Paper Pad cut with ODBD's Rectangles Die
  4. White Card Stock die cut with ODBD's Lattice Background Die and altered with scissors to cover half of DP

  1. Gold DP from ODBD's Wedding Wishes Paper Pad; die cut with ODBD's Filigree Frames Die
  2. White Card Stock, Black Ink, sentiment from NEW Long Lasting Love; die cut with Ovals Die
  3. Image from NEW Long Lasting Love, stamped with Black Copic compatible ink on card stock, colored and die cut with Rectangles Die
  4. Pink and green card stock, Bitty Blossoms Die with Liquid Pearls White Opal Centers 
Copic Colors -

W3, CO, C3, E29
YG61, YG63
RV00, RV02
Y11, Y15, Y26, E25
B34

and the inspiration photo from Danielle & Josh Menning Photographic


Thanks for visiting!  Until next time, 
Blessings!

Friday, June 16, 2017

Time for a Look Back at June's Release at ODBD

Good morning and welcome to a special look back at this month's Our Daily Bread Designs release. 
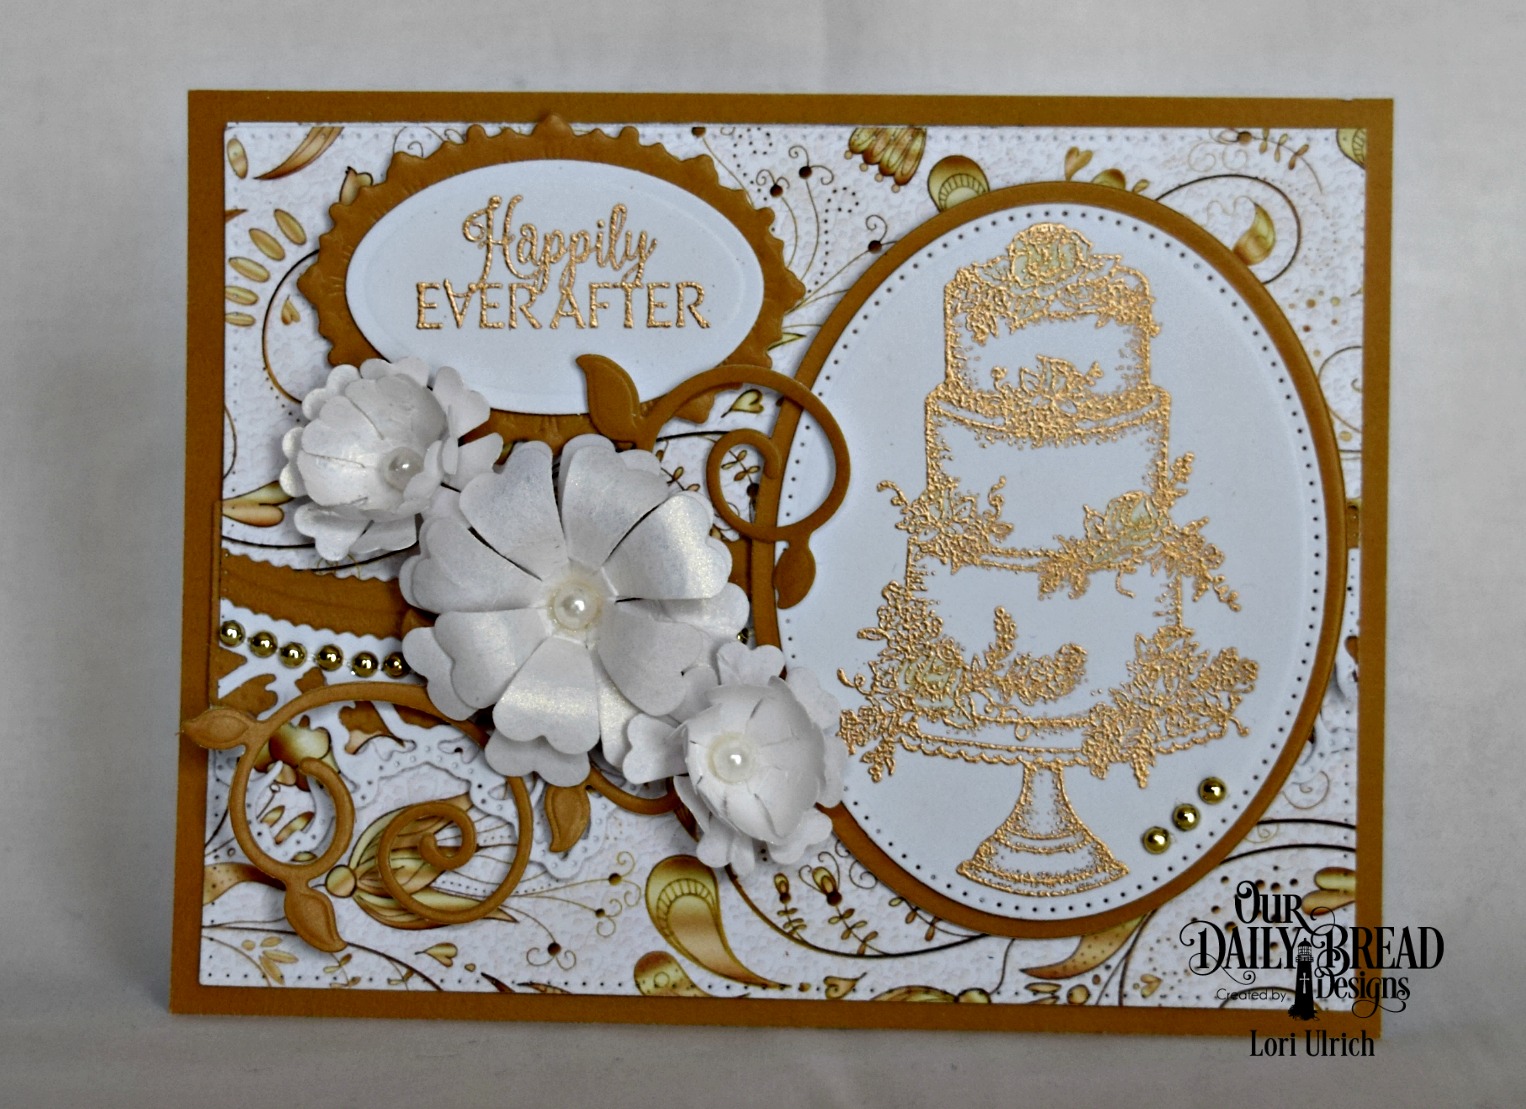
Here is the project I created using Long Lasting Love stamp set and Wedding Wishes Paper Pad.  For more inspiration using the June Release be sure to visit the ODBD Blog.
I started with a gold base measuring 5.5 x 4.25 inches from the Wedding Wishes Paper Pad collection.  I selected a coordinating gold and white print (also from this collection) and used ODBD's Pierced Rectangles Die to cut out the DP layer, white card stock layer (to create the lace layer) and another sheet of gold DP.  Once I cut the three layers, I used the Leafy Edged Borders Die to create the wavy layer (including the white lace layer.)  I stamped my image (from the new Long Lasting Love with a watermark ink on white Card Stock) and embossed the image with gold embossing powder.  I die cut the image using the Pierced Ovals Die and nested a gold mat layer underneath using the Ovals Die set.  I created the floral spray with white card stock and the Pretty Posies Die along with the gold DP and ODBD's Fancy Foliage Die.  I treated the blossoms with Iridescent Gold Glitter Mist and added seed pearls with a clear glue to each center.  The sentiment (also embossed and from the Long Lasting Love stamp set) is matted with ODBD's Ornate Ovals Die.

Here are the new items you see...


and a few old favorites...


Thank you for stopping by!  Please take a few moments to visit my design team sisters and leave some love!  We love hearing from you and appreciate your comments!  Blessings...

Sandee * Lisa * Cathy * Diana * Julie 
Kathy * Robin * Lori (ME)Helen * Dawn * Sabrina

Wednesday, June 14, 2017

~ Boho Mr. & Mrs. ~

Sometimes you find something so cute that you just have to try creating it again!  Last week I shared a card featuring a few new products from Our Daily Bread Designs.  Well I loved the card SO much I decided to create a similar card with an entirely different technique.  I love finding new ways to incorporate the items I have in my stash.  And this time, I found a fun new way to use the Scalloped Chain Die.  I also used the Mr. & Mrs. Die and Long Lasting Love stamp set (again).  That's a sure sign of something infinitely useful in my stash!  ;-) 

Really, it isn't nearly as complicated as it looks.  I started with a rich eggplant card stock base.  I added a slightly smaller white card stock layer, distressing the edges.  For the next layer, I used the Scalloped Chain Die and white card stock.  After die cutting, I adhered the die cut to a layer of white card stock and inked both the scalloped chain die and white background in graduated distress ink colors.  For this project I used a purple, ocean blue and teal color.  After inking it to the desired intensity, I trimmed the bottom layer (now inked) to fit neatly under the die cut.  Here is a photo of the completed base.  But notice what is different?  After inking, I FLIPPED the die cut so the color spectrum would be reversed and ADDED back the white center pieces with glue.  :-)  Here's a photo AFTER flipping and before adding anything else!

Then I could get down to business and dress up this baby!  I added a white sentiment mat (created with ODBD's Ovals Die) and focal panel (in a rich purple) using the Layered Lacey Ovals Die.  The NEW Mr. & Mrs. Die and a bit of teal CS create the center die cut.  I added a few white CS posies (frosted with glitter on the edges) using ODBD's Pretty Posies Die and Lovely Leaves Die.  I stamped the sentiment with a soft teal ink on white card stock (Long Lasting Love stamp set) and die cut it using an old favorite, Layered Lacey Ovals Die.  And for a bit more bling, I added clear micro beads in the center of each blossom. 

So here are the new items you see...


and a few old favorites...


Thank you for stopping by!  Be sure to come back Friday.  I have a special look back project featuring more products from this month's release at Our Daily Bread Designs.  This one will have a whole lotta gold...  Blessings!

Surprise!!! It's Best Bunny!

There is something about Granny Apple Green that just brings a smile to my face!  When the first signs of Spring appear you are sure to see...