Sunday, October 31, 2010

Sticklepalooza


Stickles have taken over my life! I find myself plastering them on everything as of late. Can you use too much? HUMMMM...... NAH! There is something about bling that just rocks! I don't know that you can have too much of a good thing. So on today's image, I took time to cover the ground with Stickles and everywhere that snow might have fallen. I also highlighted the icicle edging and the snowflake cutout. The result are so cute! I can't wait to send it. I can definitely wait for snow (big goofy grin) however! It looks so much better on paper! Blessings to you and yours.

Lori

Card Recipe

6 X 6 inches
Card Stock - Bazzill - Pale Lavender
Card Stock - Bazzill - White Swiss Dot
Card Stock - Image - Gina K. Pure Luxury
Designer Paper - Bo Bunny - Winter Joy Snow Fall - Reversible
Image - Stampavie - Rose Cuddling the Winter Bunny by Sarah Kay
Sentiment - Clear Dollar Stamps, LLC - Heartfelt Sentiments
Ink - Image - Memento Tuxedo Black, Copics
Ink - Sentiment - Memento - Grape Jelly
Ink - Sponging - image and sentiment backgrounds - Memento - Lulu Lavender
Paper Edger - Icicles - Martha Stewart
Paper Punch - Snowflake - Martha Stewart
Stickles - Ranger - Diamond
Ribbon - Offray Satin Fringe (adhered with Scor-Tape_
Ribbon - Stampin Up - Lavender Grosgrain
Embellishments - Pebbles by SMH - Egg Hunt
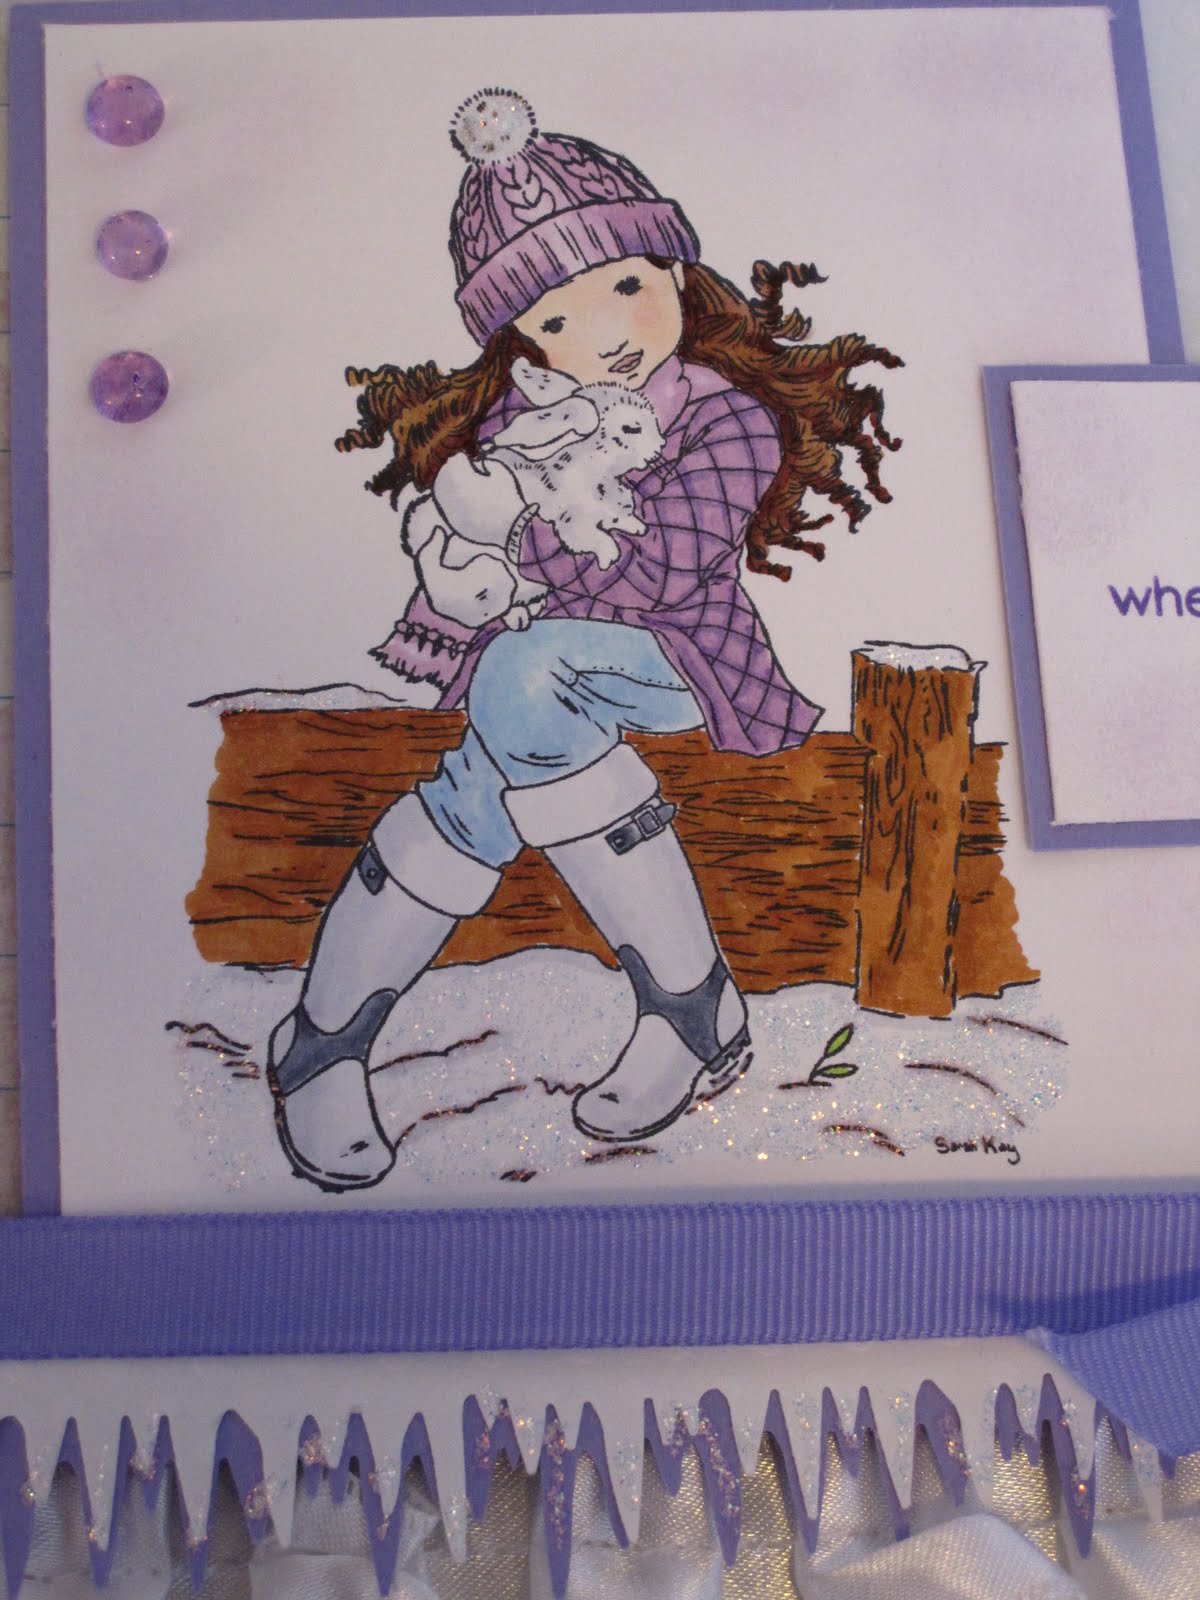


Copic Colors

Hair - E29, E25, E35
Hat and Sweater - V01, V12, V15, V17
Jeans - B000, B41
Skin - E00
Blush - R20
Leaf - YG25
Boots - C1, C2, C5, C7
Bunny - C1, C2, C5
Gloves - C0, C1
Wood - E39, E37, E99

Friday, October 29, 2010

Coloring poinsettias with Copics


I'll start out with a warning. Today's post is long! Several folks have requested information on coloring poinsettias. With the holidays coming up, it seemed the perfect time to tackle it. So let's dive in!


Today's stamp set is from Gina K. Designs (Festive Frames by Melanie Muenchinger). I used Memento Tuxedo Black Ink to stamp the image on my favorite Copic compatible paper by Gina K. Designs (Pure Luxury).


The first Copic I would use is R46 (Strong Red). I use this to color in the edges. If you notice I cover quite a bit of the image but will use the next color to shade in.


The next step is to take Copic R29 (chisel edge) and color over the previous color plus lay down a light layer filling in more of the image.


At this point pull out the R22 which is Light Prawn (yes, it is pink) and color in the remaining white spots taking particular care to blend over the remaining inks.


Then I used the R29 to color my berries and YG67 (Moss) to color the evergreens.


Now layer E29 on the dark points of your pinecones. E39 fills in the lighter spots nicely. I then topped off the image with Y17 (Golden Yellow) in the center of each flower.


I then went back and colored in the trim with the same reds used previously. I just didn't like it looking so plain Jane. Here you see R46, R29 and R22.


The finished card design is 5 X 6 inches.

Card Recipe

Card Stock - Bazzill - Red, Black
Card Stock - Image - Gina K. Pure Luxury
Embossing - Provocraft Cuttlebug - Tartan Plaid Folder
Ink - Image - Memento Tuxedo Blakc
Ink - Coloring - Copic (colors above)
Ink - Embossing - Versamark
Embossing Powder - Ranger Embossing Tinsel - Red
Stickles - Yellow (Poinsettia centers)
Smooch Spritz - Vanilla Shimmer - sprayed over image after coloring
Bow Easy - helped me create the fun bow
Ribbon - Offray - Black Satin
Pearls - Kaisercraft - Red


Thanks for looking!

Lori

Wednesday, October 27, 2010

MOJO162


It's that time again! Mojo Monday is back and I am proverbially late in participating... (lol) What else would I expect? The sketch this week was pretty tough. I really wanted to create a round card. I have had this Fluffles image for at least a year. I love Fluffles! Please don't tell my St. Bernards. They would NOT understand my love of cats! So to satisfy this deep need I colored one! (And I even used my Cricut and Gypsy again! Are you proud of me? (wink, wink) Enjoy!

Lori

Card Recipe

Card Stock - Bazzill - Yellow, Black and White
Card Stock - Image - Gina K. Pure Luxury
Designer Paper - Adornit - Spider Webs
Stamp - Image - Stampendous Cling - Fluffles Broomstick
Stamp - Sentiment - Studio G - Series 34
Ink - Memento - Tuxedo Black (image and sentiment)
Ink - Coloring - Copics (colors below)
Cricut Cartridges - George, Mini Monograms
Embossing - Provocraft Cuttlebug Folder
Die Cuts - Nestabilities - Standard Circles Large, Petite Scalloped Circles Large
Plaid - Paper Tearing Ruler - Water
Ribbon - Offray - Purple 5/8 inch satin


Copic Colors

Fluffles - C0, C1, C2, C5, C7
Cheeks - R22
Frog - YG23, YG25
Broomstick - E35, Y17, YR15
Hat - V01, V04, V09, V15
Background - BG0000, B41

Tuesday, October 26, 2010

Coloring Pumpkins with Copics

As promised, I am posting a mini tutorial on coloring pumpkins with your Copics. Try coloring some. They are really fun to do!

Lori

Stamp - Inkadinkado
Ink - Memento - Tuxedo Black
Card Stock - Gina K. Pure Luxury


First stamp your image using a Copic compatible ink and paper.


Next color the edges of your pumpkin or pumpkins with YR07 (Cadmium Orange).


Next color a little more in with YR04, taking care to color OVER the YR07 you have already put down.


Next, color in with YR15. On this step it is crucial to use the CHISEL edge of your Copic. This will blend the layers of orange and make the color transition seamless.


Next fill in the highlight with Y21. Again use the CHISEL edge at this stage for the best results. I went back in with the brush side of my YR15 and lightly blended upward into the Y21. (This is not shown in the following photos.) It makes the pumpkin have a more "rounded" look!


The greenery was colored with YG23 and YG25. I then lightly highlighted the coloring with my atyou Spica pen in Olive for some bling. Stickles would work well also. Again don't forget to blend up with the brush side of the YR15 into the Y21 for a nice subtle look. (Sorry this photo would not post! :-( But feel free to check out yesterday's post to see a pumpkin colored with this technique! Happy coloring and we will do a poinsettia soon!

Monday, October 25, 2010

Breaking out the Cricut...


A while back, I finally broke out my Cricut and Gypsy after a LONG sabbatical. It's not that I don't love my dear friends but it seems my time is so limited. Just like a teenage crush, my attention turned to my new love, my Copics. And unfortunatly just like the sad mop (in the Swiffer commercials) my old toys were left behind. That commercial just cracks me up. Not sure why, but it does! (LOL)

Anywho... I decided to rekindle the romance after seeing a post on the Cricut Messageboard about the Heritage cartridge. Let me confess... I have tons of cartridges and some I have never (GASP) used! There must be a twelve step program for this, right? Thanks to whoever came up with this brilliant idea! They used the wrought iron gate welded together 4 times to make a fabulous background. They used it on a scrapbook page which undoubtedly was much easier to cut. I tried to do this for a small card and was left punching out lots of little hanging chads.... ARGGG...

But the results were well worth it. I especially love the details added by paper piecing the headband and dress. I used a little Chatterbox paper snippet I had to add a little pizzaz! It turned out so cute! I hope you find it beautiful too! Thanks so much and have a wonderful week!

Lori

P.S. Watch my blog in the next few days as I am going to post instructions on coloring pumpkins! I have had quite a few questions on that and my poinsettias. I plan to do both this week!


Card Recipe

Finished Design
6 X 5 1/4

Card Stock - Bazzill, dark brown, cream, black
Card Stock - Image - Gina K. Pure Luxury
Designer Paper - Autumn Sweetwater Paper Collection (out of my way back when stash)
Designer Paper - Paper Piercing (headband, dress) Chatterbox (unknown pattern)
Stamp - Image - C.C. Designs Rubber Stamps - Pumpkin Emma
Stamp - Sentiment - Studio G. - Series 20
Ink - Image - Memento Tuxedo Black
Ink - Image - Coloring - Copic (colors to follow)
Ink - Edges - Memento Rich Cocoa
Ink - Sentiment - Memento Rich Cocoa
Paper Punch - Ionic Ticket punch
Die Cut - Provocraft - Heritage - Iron Gate (welded on my Gypsy at 90, 120, 180, -90 degrees) Size - 4.98 Width x 4.92 Height
Die Cuts - Spellbinders Nestabilities - Eyelet Circles, Standard Circles Large
Ribbon - Offray - 7/8 Grosgrain Brown
Pop Dots

Copic Colors

Hair - E25, E27, E33
Skin - E000, E00, E21
Blush - R20
Shadow on Apron - C1
Shoes - E25, E27
Wagon Handle - E27
Tires - C5, C7
Pumpkin - YR04, YR07, YR15, Y38
Stem - YG03, YG23

Sunday, October 24, 2010

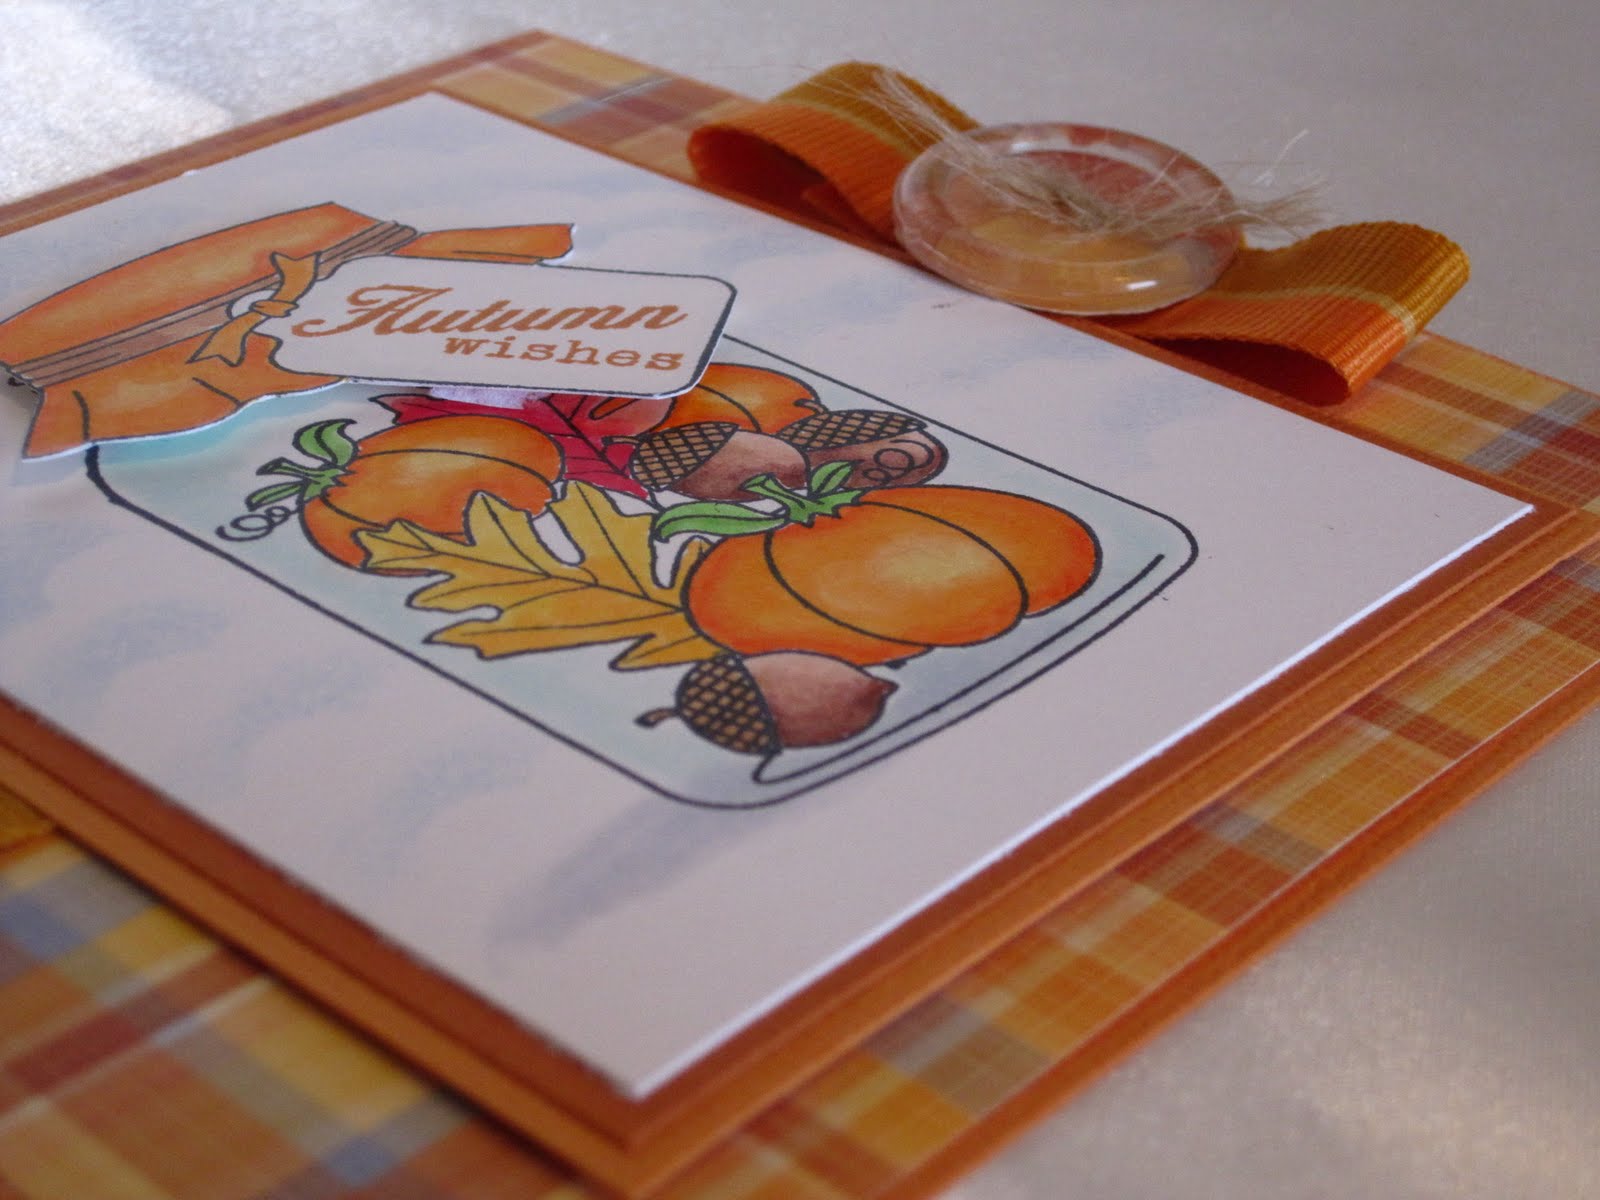
A message in a bottle...


Well the weather in Kentucky is just not cooperating! It is late October and the high will be 79 degrees today! Makes it a little hard to think about making Christmas cards. The mild weather is wonderful, though. I enjoy having a few more mild days to get things done in the yard and just plain play! The last few days my house had remained neglected... :-( but I have been prolific. So I thought you might want a sample of some of the things I have been up to. For those planning on doing some Copic coloring on their Christmas cards check out the final of my two cards today for some Copic color suggestions! Have a wonderful and blessed Sabbath with yours!

Lori

Card Design

Finished Design
6 X 6 inches

Card Stock - Bazzill
Card Stock - Image - Gina K Pure Luxury
Designer Paper - Chatterbox (from my very old stash)
Ink - Image - Memento - Tuxedo Black
Ink - Image - Coloring - Copic (numbers to follow)
Ink - Sentiment - Close to My Heart - Autumn Terracotta
Ink - Background - Memento - Summer Sky
Stamps - Image & Sentiment - Papertrey Ink - Friendship Jar & Friendship Jar Fall Fillers
Ribbon - Unknown
Button - Unknown (clear one in my stash, glued matching designer paper to back and pulled jute string through)


Copic Colors

Jar - BG0000, BG10
Shadow - C1, C2
Red Leaf - R00, R02, R27, R29
Yellow Leaf - Y17, Y38
Acorns - E11, E13, E18, E29, E33
Stems - YG07, YG17
Pumpkins & Fabric Top - YR04, YR07, YR15, Y21
Tie on Fabric E33


And now for a Christmas design...


Finished Design

5 X 7 Inches

Card Stock - Bazzill
Card Stock - Image - Gina K. Pure Luxury
Designer Paper - Maple Grove - Cedar - We R Memory Keepers reversible
Image and Sentiment - Our Daily Bread Designs - Blessed Christmas
Ink - Sentiment - Memento - Lady Bug
Ink - Image - Memento - Tuxedo Black
Ink - Image - Copic (colors to follow)
Embossing - Provocraft - Cuttlebug - Swiss Dots Folder
Pearls - Kaisercraft - Basics - Red
Ribbon - Offray 5/8 in Satin Red


Copic Colors

Poinsettia - R46, R27, R22
Color with R46 around the edges, fill in with R27, leaving a small area blank, fill in with R22 and blend with this color all over...
Leaves - YG25, YG67
Center - YR15


Saturday, October 23, 2010

ICS88


Time for another challenge! I entered today's card over at Inspirational Card Sketches. This one has been modified slightly. I took my ribbon north/south instead of east/west. Have you ever created something and thought "yikes, that wasn't what I wanted to do?" LOL... Well that's exactly what happened there. I knew what the design was supposed to be but my creative side thought better of it... So hopefully this will work!

Thanks as always for looking and have a wonderful day!

Lori

Card Design

Finished Size
5 X 6 Inches

Card Stock - Bazzill
Card Stock - Image - Gina K.
Designer Paper - Unknown (a scrap, I had on hand)
Ink - Image - Memento Tuxedo Black
Ink - Image - Copic
Ink - Sentiment - Memento Rich Cocoa
Stamp - Image and Sentiment - Justrite - Autumn Blessings
Ribbon - Offray - 7/8 Satin Sherry
Dies - Spellbinders Nestabilities - Classic Ovals Small, Ovals Large
Ranger Ink - Diamond Stickles - (berries)
Scotch Brand - Foam Tape


Copic Colors

Apples - R02, R29, R46, R59, Y38
Greens - YG23, YG25
Basket - E33, E35, E39
Berries - YR18 (light coating of Stickles, see above)
Acorns - E33, E35

Surprise!!! It's Best Bunny!

There is something about Granny Apple Green that just brings a smile to my face!  When the first signs of Spring appear you are sure to see...