Showing posts with label Asters and Leaves. Show all posts

Tuesday, March 17, 2015

Welcome to the Anniversary Blog Hop at Our Daily Bread Designs!

Welcome!  Grab a cup of joe and settle in because today we are having an Anniversary Party!  Our Daily Bread Designs celebrates 7 years of doing business!  And to mark this milestone, seven randomly selected winners will each receive one of the new ODBD Anniversary stamp sets just for commenting on the Design Team cards!  You have until March 19, 2015 at 9:00 p.m. EDT to leave your comments on the Designers Blogs for a chance to win!  The Winners will be posted on the ODBD Blog on March 20th, so be sure to check back there to see if you won!

Did you notice, I mentioned NEW Anniversary stamp sets?  Yep, you heard right.  ODBD has a special release (2 stamps sets) to mark this milestone.  And I am pleased as punch to share them with you.  My first project (or pink palooza) features the new set, God Verses.
  

Today's card measures 5.5 x 4.25 inches.  I started with a white card stock base and added a soft pink layer using ODBD's Flourished Star Pattern Die.  I added a soft rose paper from the Shabby Rose Paper Collection and chose soft gingham and wicker weave print (also from this collection) for my layers.  A bit of faux lace compliments of the Beautiful Borders Die peeks out from behind the wicker DP with just a sprinkle of pink adhesive backed pearls for glitz.  I die cut my scripture panel with ODBD's Pennant Die and added a flourish of DP blossoms created with the Asters and Leaves Die set.  And a fancy flourish isn't complete without greenery created with the Fancy Foliage Die and a fun pink pearl flourish layered up for added interest.  

So here's the new God Verses set...


But there is more!  I told you there were TWO sets...  
So here is my second card featuring the new God Quotes set...


This time, I started with a black card stock base (5.5 x 4.25 inches) and added a white mat.  This card features some beautiful chalkboard DP from ODBD's Chalkboard Paper Collection.  I chose to stamp my sentiment on a clean white panel and accent it with a blinged out star (created by nesting two die from the Sparkling Stars Die.  After cutting the star out of chipboard, I added white paint, distress crackle and a bit of crystal coarse glue.  A tiny mulberry rose and greenery from the Fancy Foliage Die fill out the additional space.  

So here's the new set...


And here are a few of the other ODBD products you see today...

SHABBY ROSE COLLECTION 6x6 PAPER PAD

CHALKBOARD COLLECTION 6x6 PAPER PAD

CSBD75 - FLOURISHED STAR PATTERN DIE

CSBD51 - BEAUTIFUL BORDERS DIES

CSBD60 - PENNANT DIES

CSBD33 - FANCY FOLIAGE DIES

CSBD79 - SPARKLING STARS DIES

Don't forget to stop by and leave all of the designers some love!  Remember, by commenting you could possibly win one of these new sets!!!  Isn't that motivation enough?  PLUS, you get to see some of the most talented ladies around!  :-)

Thanks for stopping by!

ODBD Blog  ** If you get lost along the way ** 

The Bread Sticks

  Lori * Chris * Angie * Silke * Robin
 * Sabrina * Lisa * Grace * Gracie * Audrey
 * Wanda * Paula * Cathy * Diana * Dawn * Sandee

Monday, December 1, 2014

It's Release Day at Our Daily Bread Designs!

Good Monday morning!  Welcome to the first day of December!  That means Christmas is only 24 days away!  This month, Our Daily Bread Designs has some special sets to share including one that is perfect for last minute Christmas cards!  Before we get to the cards I have today, let me share how you can add to your own Our Daily Bread Designs' stamp stash!  This month as part of the hop, three randomly selected winners will each receive a $25 gift certificate to the ODBD Store, to be used toward the purchase of ODBD Stamps found in the "stamps column" of the website just for commenting on the Design Team cards!  You must hurry though.  You have until December 2, 2014 at 9:00 p.m. EST to leave your comments on the Designers Blogs for a chance to win!  The Winners will be posted on the ODBD Blog on December 3rd, so be sure to check back there to see if you won!
 
I have a couple of projects to share including one using the set, Let It Snow and some new ODBD Paper, the Patriotic Collection.

I stamped the image on Copic compatible paper and colored it with alcohol markers.  I added a bit of glitter glue to the "snow" after trimming.  My card base is a deep red with Kraft paper matting and layers of DP from the new Patriotic Paper Collection.  I took a bit of leftover board DP and stamped my sentiment on it and added die cut holly and branches found in some of ODBD's older die sets,  Fancy Foliage and Circle Ornaments 
 
Here's the new items you see today...


 I also decided to create a project with a bit more of a spring feel to it!  Thankfully, we haven't had much bad weather in my part of the country (YET) so I opted to create a breath of fresh air... 


This time, I used a moss green card stock with white matting to frame the DP from Our Daily Bread Designs' Blushing Rose Paper Collection.  I used last month's release, Sparkling Stars Die, to cut out the center with coordinating papers.  I then popped the image up with dimensional foam.  I used Asters and Leaves Die along with the Fancy Foliage Die to create a floral spray.  The ephemera were stamped and cut using the new ODBD releases, Admit One, Admit Three and coordinating Mini Tags Die.
 
The new release items...


The versatility of these sets...  AMAZING!  Now be sure to stop by and leave some love for all of today's designers!  You might just win a GC from Our Daily Bread Designs!  Thanks for stopping!
 
ODBD Blog  (If you get lost along the way)
 
The Breadsticks
 
Julie * Chris * Cathy * Lori (you are here) 
Dawn * Sandee * Paula * Angie 
Lisa * Audrey * Silke * Wanda *
 Grace * Gracie (Guest Designer)

Wednesday, October 1, 2014

Welcome Our Daily Bread Designs' October Release

Good morning and welcome to Our Daily Bread Designs' October Release Blog Hop!  I am pleased to share a couple of projects using some of the new products.  Some of the items this month are perfect for fall and others for Christmas!  So take a peek and be prepared to fall in love!  

This month three randomly selected winners will each receive a $15 gift certificate to the ODBD Store, to be used toward the purchase of ODBD Stamps found in the "stamps column" of the website just for commenting on the Design Team cards!  You have until October 2, 2014 at 9:00 p.m. EDT to leave your comments on the ODBD Blog or the Participating Designers Blogs for a chance to win!  The Winners will be posted on the ODBD Blog on October 3rd, so be sure to check back there to see if you won!  :-)

I can't wait to get started!  So here goes...  my first project this month featuring the **Autumn Tree stamp set...  Look closely and you will see some fun "initials" I added to the heart carving...

Items marked with ** are new to ODBD this month...

I colored my image with Copics and sponged in various shades of ink on the background to resemble a fall sunset.  Once I stamped my sentiment (also from **Autumn Tree) I die cut the image and layered in on my designer paper (Blooming Garden Paper Collection).  

Here are the die cuts by layer you see -

Fancy Foliage Die (greenery) 
**Peaceful Poinsettias Die (blossom center)

And if you are a visual person like me, the product images...
some new...


and some old favorites...

CSBD55 - VINTAGE LABEL DIES


CSBD56 - VINTAGE FLOURISH PATTERN DIES

CSBD57 - ASTER DIES

CSBD33 - FANCY FOLIAGE DIES

BLOOMING GARDEN COLLECTION 6x6 PAPER PAD

and now for my second card looking ahead to Christmas...

You can't go wrong with a classic red, white and green combo!  I stamped my image, **Merry Christmas Ornament, with a green ink on white Copic Compatible paper.  I then colored each holly leaf with a green marker and added tiny paper punched CS "berries."  The coordinating **Matting Circles Die set made quick work of creating the perfect circle.  I inked all edges with more green ink before adding onto the doily die cut layers.  

Here's the layers you see (October release items denoted with **)

Doily Die (red and white card stock layered)

SO EASY!!!!  

Here's the new items you see - 


and some old favorites...


Now it's time to send you on your way!  (Hopefully, with visions of sugarplums dancing in your head...)  Don't forget to leave some love as you hop along!  You just might win!  Blessings...

ODBD Blog  **  If you get lost along the way!

 Grace * Chris * Dawn * Lori (YOU ARE HERE)
 Julie * Sandee * Cathy * Paula 
 Lisa * Silke * Wanda 

Tuesday, September 9, 2014

~ Birthday Blessings ~ September and More From ODBD

Good morning!  So glad you could stop by!  Today I have a shabby chic card to share using a menagerie of products and techniques.  Glitter, paint and even hairspray went into this creation...  so fun and oh so messy!  :-)
 
 
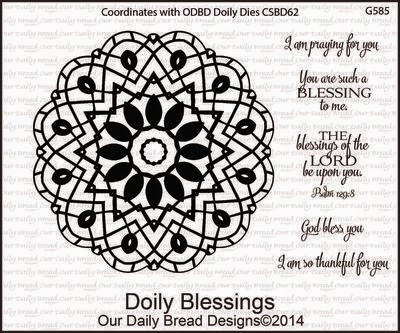
I started with a simple black card stock base. (5.5 x 4.25 inches to be exact...)  I added a slightly smaller DP from Our Daily Bread Designs' Soulful Stitches Paper Collection.  The edges were distressed with a distress tool and lightly inked with a pale khaki distress ink.  I stamped the doily image on ecru card stock (Doily Blessings) and used the coordinating Doily Die (mat image) to cut the image in shadow and the intricate die to cut/emboss a doily in black CS.  I layered both (slightly off center of each other to show the design).  I cut the heart out of thin cardboard (Ornate Hearts Die) and slathered it with shades of brown distress ink and white crackle paint.  I used my heat gun to speed the drying process and managed a slightly "cooked" look...  (wasn't what I was aiming for but it WORKED!)  I slathered the heart with crystal liquid adhesive and added a mixture of gold glitter and coarse silver glitter.  Once it dried, I sprayed it heavily with hairspray (hopefully to discourage any shedding and maintain hold...)  Then I spritzed the entire heart with a silver and gold glitter mist.  After it dried, I layered it up and added a die cut vine with ecru blossoms Fancy Foliage and Asters and Leaves.  Tiny ecru pearls finish the centers.  I stamped the sentiment in black ink on ecru Birthday Doily and cut it out with the Pennants Die.  I just love all the layers....
 
Here's a close up.... 
 
 
The new products you see... 


and some old favorites...


Thanks so much for stopping by!  Don't forget to pop in tomorrow to see what the Word Art Wednesday Crew is up to! 
 
Blessings...
 
Lori 

Monday, July 14, 2014

~ Imagine ~

Hello and welcome to another work week!  That rolled around entirely TOO fast, didn't it???  Today I have a recycling charmer to share.  I decided to pull out some cardboard and incorporate it into my project.  A little shabby, office chic...  in honor of the first day back...

I started with a dark chocolate brown card base and added a leaf green mat.  I then cut a piece of cardboard (straight from an old box) and peeled the top layer off.  I wanted to reveal some of that cool corrugated texture inside...  I stamped my sentiment (the new Our Daily Bread Designs' set, Pennant Row in chocolate on white card stock and used the coordinating Pennant Row Die to cut it out and add a dark brown scalloped mat.  I used the Asters and Leaves Die to create my sunflower.  I cut two layers of petals in gold, glued them together and pooled a large center of Glossy Accents adhesive.  I then sprinkled brown flocking powder on to create the "seeds."  And because I can only imagine what that day will be like as Mercy Me so beautifully sings...  I added an amazing die cut cross using Ornamental Crosses Die.  I get chills thinking about it...  
 
Here are just a few of the items you see here today...


Thanks so much for stopping by today!  Don't forget to stop back Thursday for our monthly look back at Our Daily Bread Designs' release. 
 
Blessings...
 
Lori
 

Tuesday, July 1, 2014

Welcome to Our Daily Bread Designs' July Release!

Good morning and welcome to Our Daily Bread Designs' July blog hop!  Today we have a variety of fun stamps and dies to share.  Your mission, if you should choose to accept it...  visit all of the designer's blogs and take in the amazing creations!  To make it even more fun, ODBD is offering not one, not two, but 3 chances to win...
 
Three winners will be randomly chosen from the comments left on the designers blogs to receive a $15 Gift Certificate to the ODBD Store, to be used toward the purchase of ODBD Stamps.  You have until July 2, 2014 at 9:00 p.m. EDT to leave your comments!  The Winners will be posted on the ODBD Blog on July 3rd, so be sure to check back there to see if you won!
 
I know you can't wait to see all of the other beautiful creations, so let's hop right into my projects this month...


Today's card features a couple of new items this month including the Pennant Row (Believe banner) stamp set and coordinating Pennant Row Die shown below.  What makes this so fun?  The stamps are aligned for you.  So I just added the word believe to my block, stamped the pennant in brown ink and used the coordinating die to cut it.  I added a few bits of baker's twine at each end... 
Aren't these just divine???


and a few other ODBD dies including...
 
 
(hollowed out heart and pale pink border on top)


(the fabulous flower you see)


and the ODBD's yummy Blushing Rose Collection...
(2 sheets - a smaller rose print revealed by the heart die and the fence panel on top...)


And now for my second card in honor of July 4th and a special member of my family who served...
 
 
This shabby creation features the new Patriotic Pennants (Sentiment) and Pennant Alphabet (USA banner) stamp sets along with the new Pennants Die (Flag sentiment & Flag Pole) and Pennants Row Die (USA swag).

CSBD25 - PENNANT ALPHABET SOLID (CLEAR STAMPS)

GCS28 - PATRIOTIC PENNANTS (CLEAR STAMPS)


I also used the following ODBD products above...
 
card background stamped on white card stock & mounted
on navy mat with Kraft card base
 
 
distressed card board panel
 

poppies with black micro bead centers
 
 
vines & brown branches
 
 
It's time to continue on your way so you can peruse what my "Sister Sticks" have created.  I hope you enjoyed stopping by to look at my creations.  Thanks so much for your continued support and don't forget to comment and play along! 
 
{{hugs}}
 
ODBD Blog (if you get lost along the way)
 
 Julie * Grace * Chris * Lori (you are here)
Cathy * Sandee * Dawn * Angie 
Lisa * Wanda * Audrey * Sabrina
 

Surprise!!! It's Best Bunny!

There is something about Granny Apple Green that just brings a smile to my face!  When the first signs of Spring appear you are sure to see...